Do you want to change 500 or even more tickets simultaneously, but you need to figure out how? And yes, you don’t need any special plugins. Everything is built in. But first, let’s talk about Jira Bulk Change.
Jira is a powerful tool for managing and tracking the progress of projects, but as your team grows and the volume of work increases, it can become time-consuming to manage individual tasks and issues one by one. Closing, moving or resolving more than 20 tickets one by one can be tedious, and what about 500 more issues? You can do it by using built-in functionality in Jira, which sits under Issue Navigator…
So, that’s where Bulk Change comes in.
So what is bulk change, and how to use it? Bulk Change allows you to perform actions on multiple issues simultaneously, saving time and streamlining your workflow. For example, you might want to change the status of multiple issues from “To Do” to “In Progress”, assign multiple issues to a specific team member or resolve multiple tickets.
Bulk Change is a hidden gem; you will need it sooner rather than later. I will give you two real-life examples.
Example no 1 – Workflow Graveyard
After cleaning up and optimising a large project a while ago, I spotted that more than 500 issues were never moved from Blocked to Closed or Resolved Status. I would say it’s a common issue because some people do not resolve tickets for months or even years. You can move them manually for 10 or 20 tickets, but for 500+, it’s a little more complex task, so… let’s sort it out. Fast!
My stupidity caused my Second example. I accidentally deployed automation, which updated close to 6,000 tickets. Fortunately, with a bit of JQL, I could revert all changes in less than 3 hours, all thanks to Bulk Change.
By the way, this tutorial will work on Jira Cloud or Data Center.
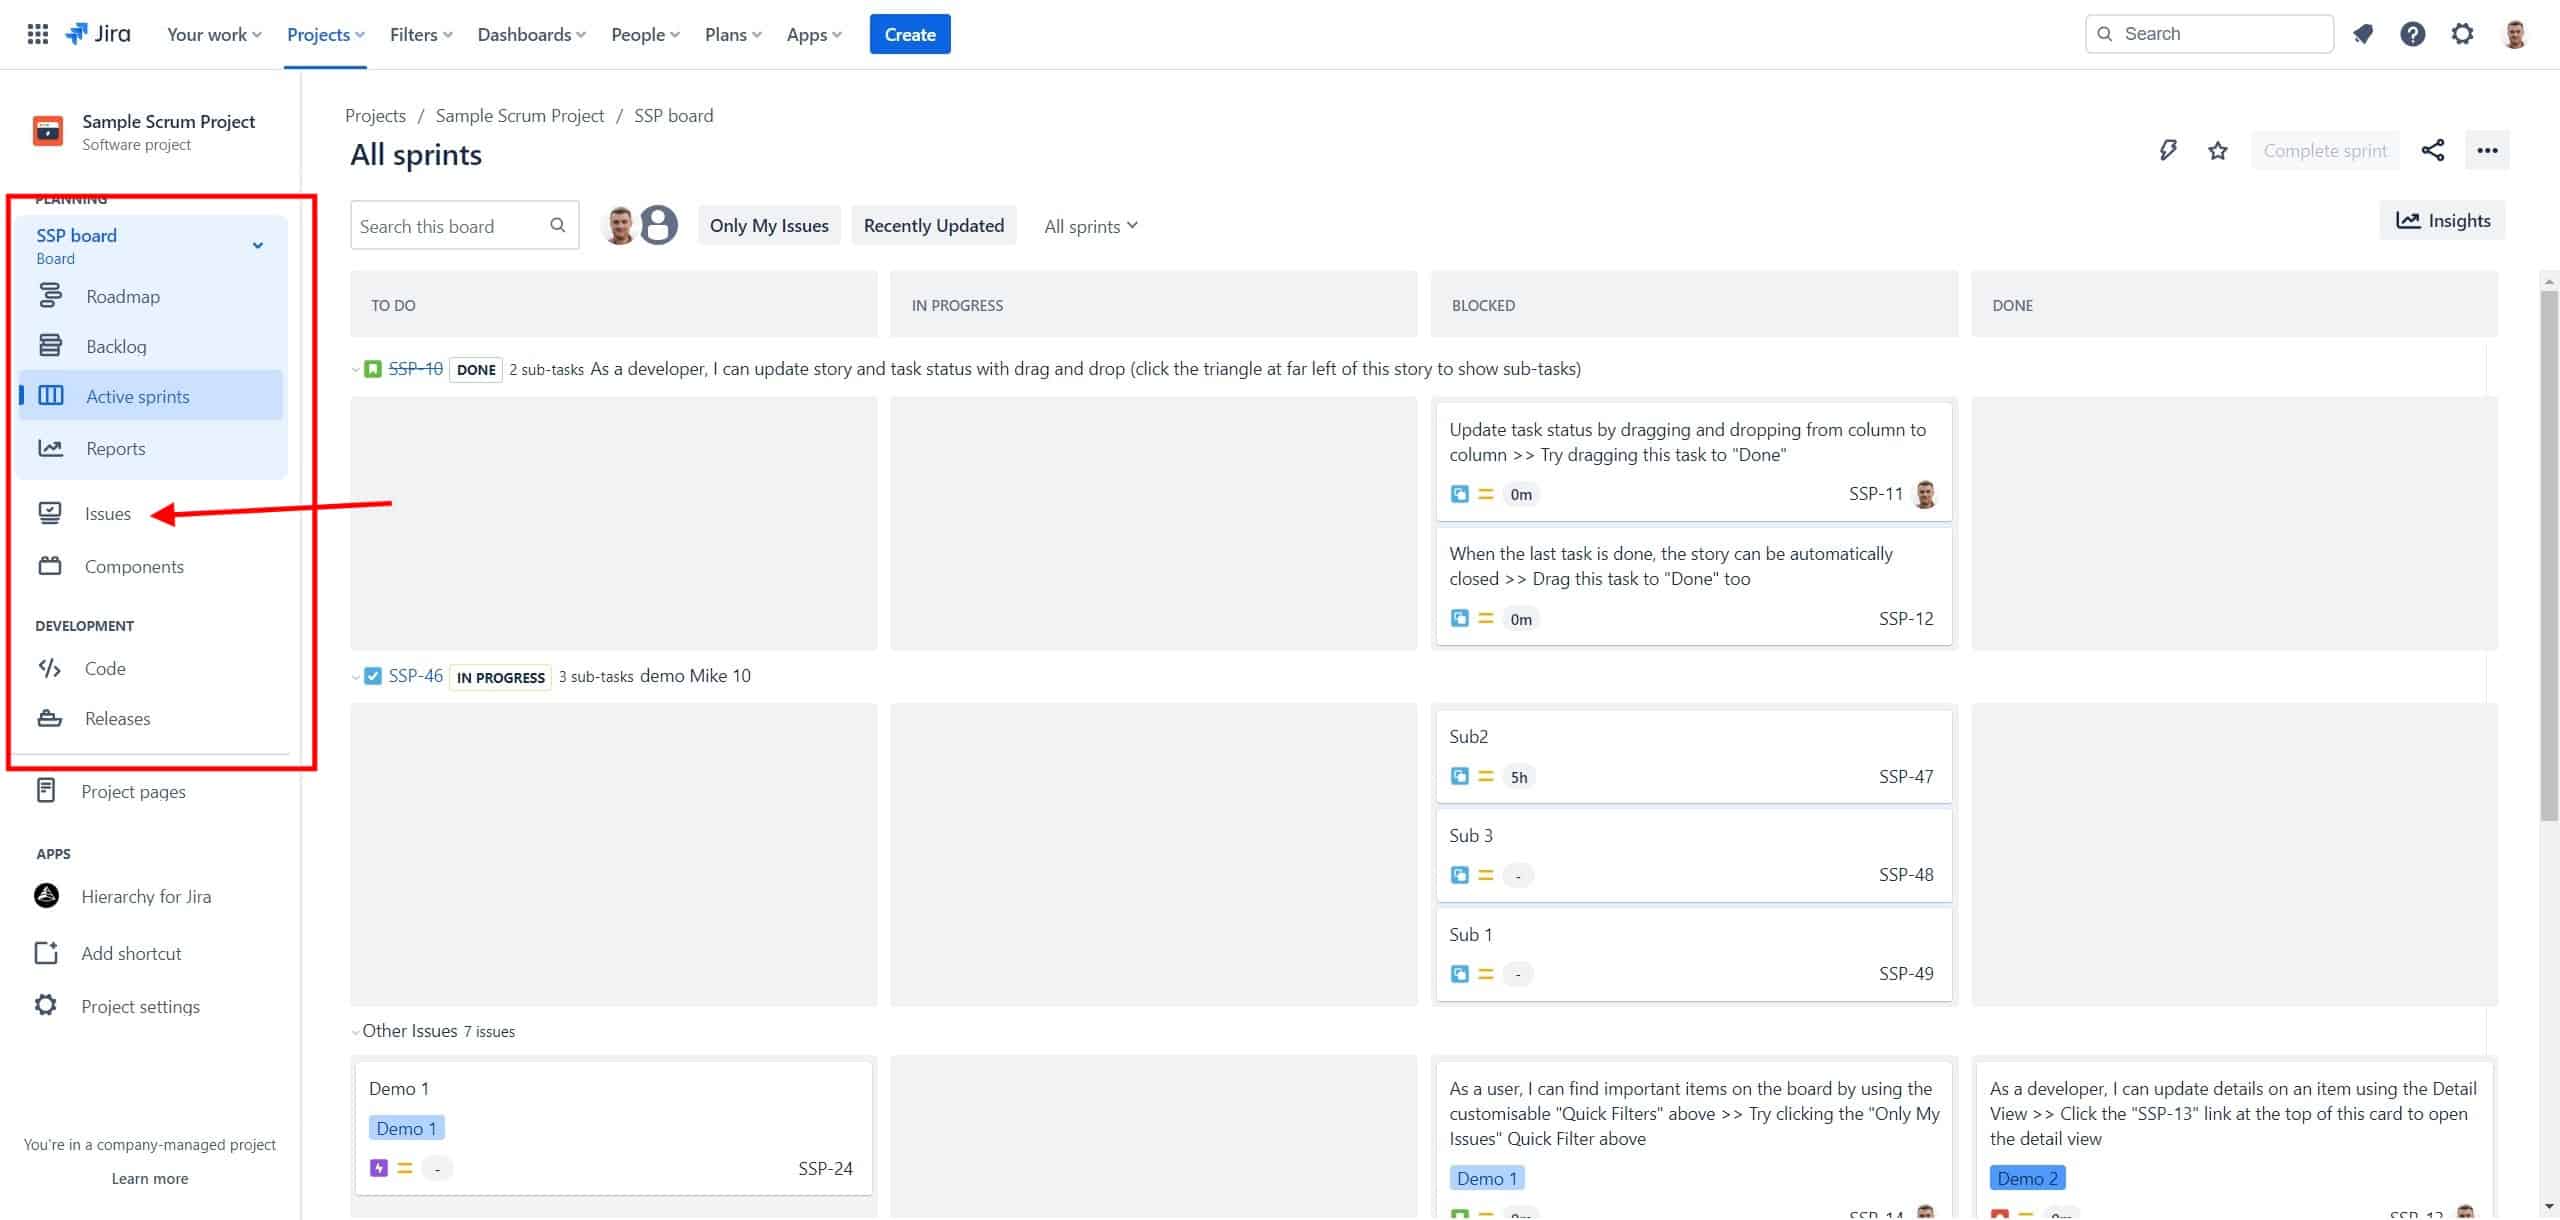
Step one is to navigate to Issues, where we need to create a filter. If you don’t know how to use JQL in Jira, check my other article, Ultimate JQL Guide for beginners; however, you can copy-paste my example. If you are new to Jira, check out my Jira Scrum Crash Course.
The goal is to move all tickets from blocked status to resolved, but let’s add something else. I also need tickets without any update for more than two months.
[convertkit form=4901102]
You need to navigate to your project and jump to Issues.
And make sure you switched to JQL.
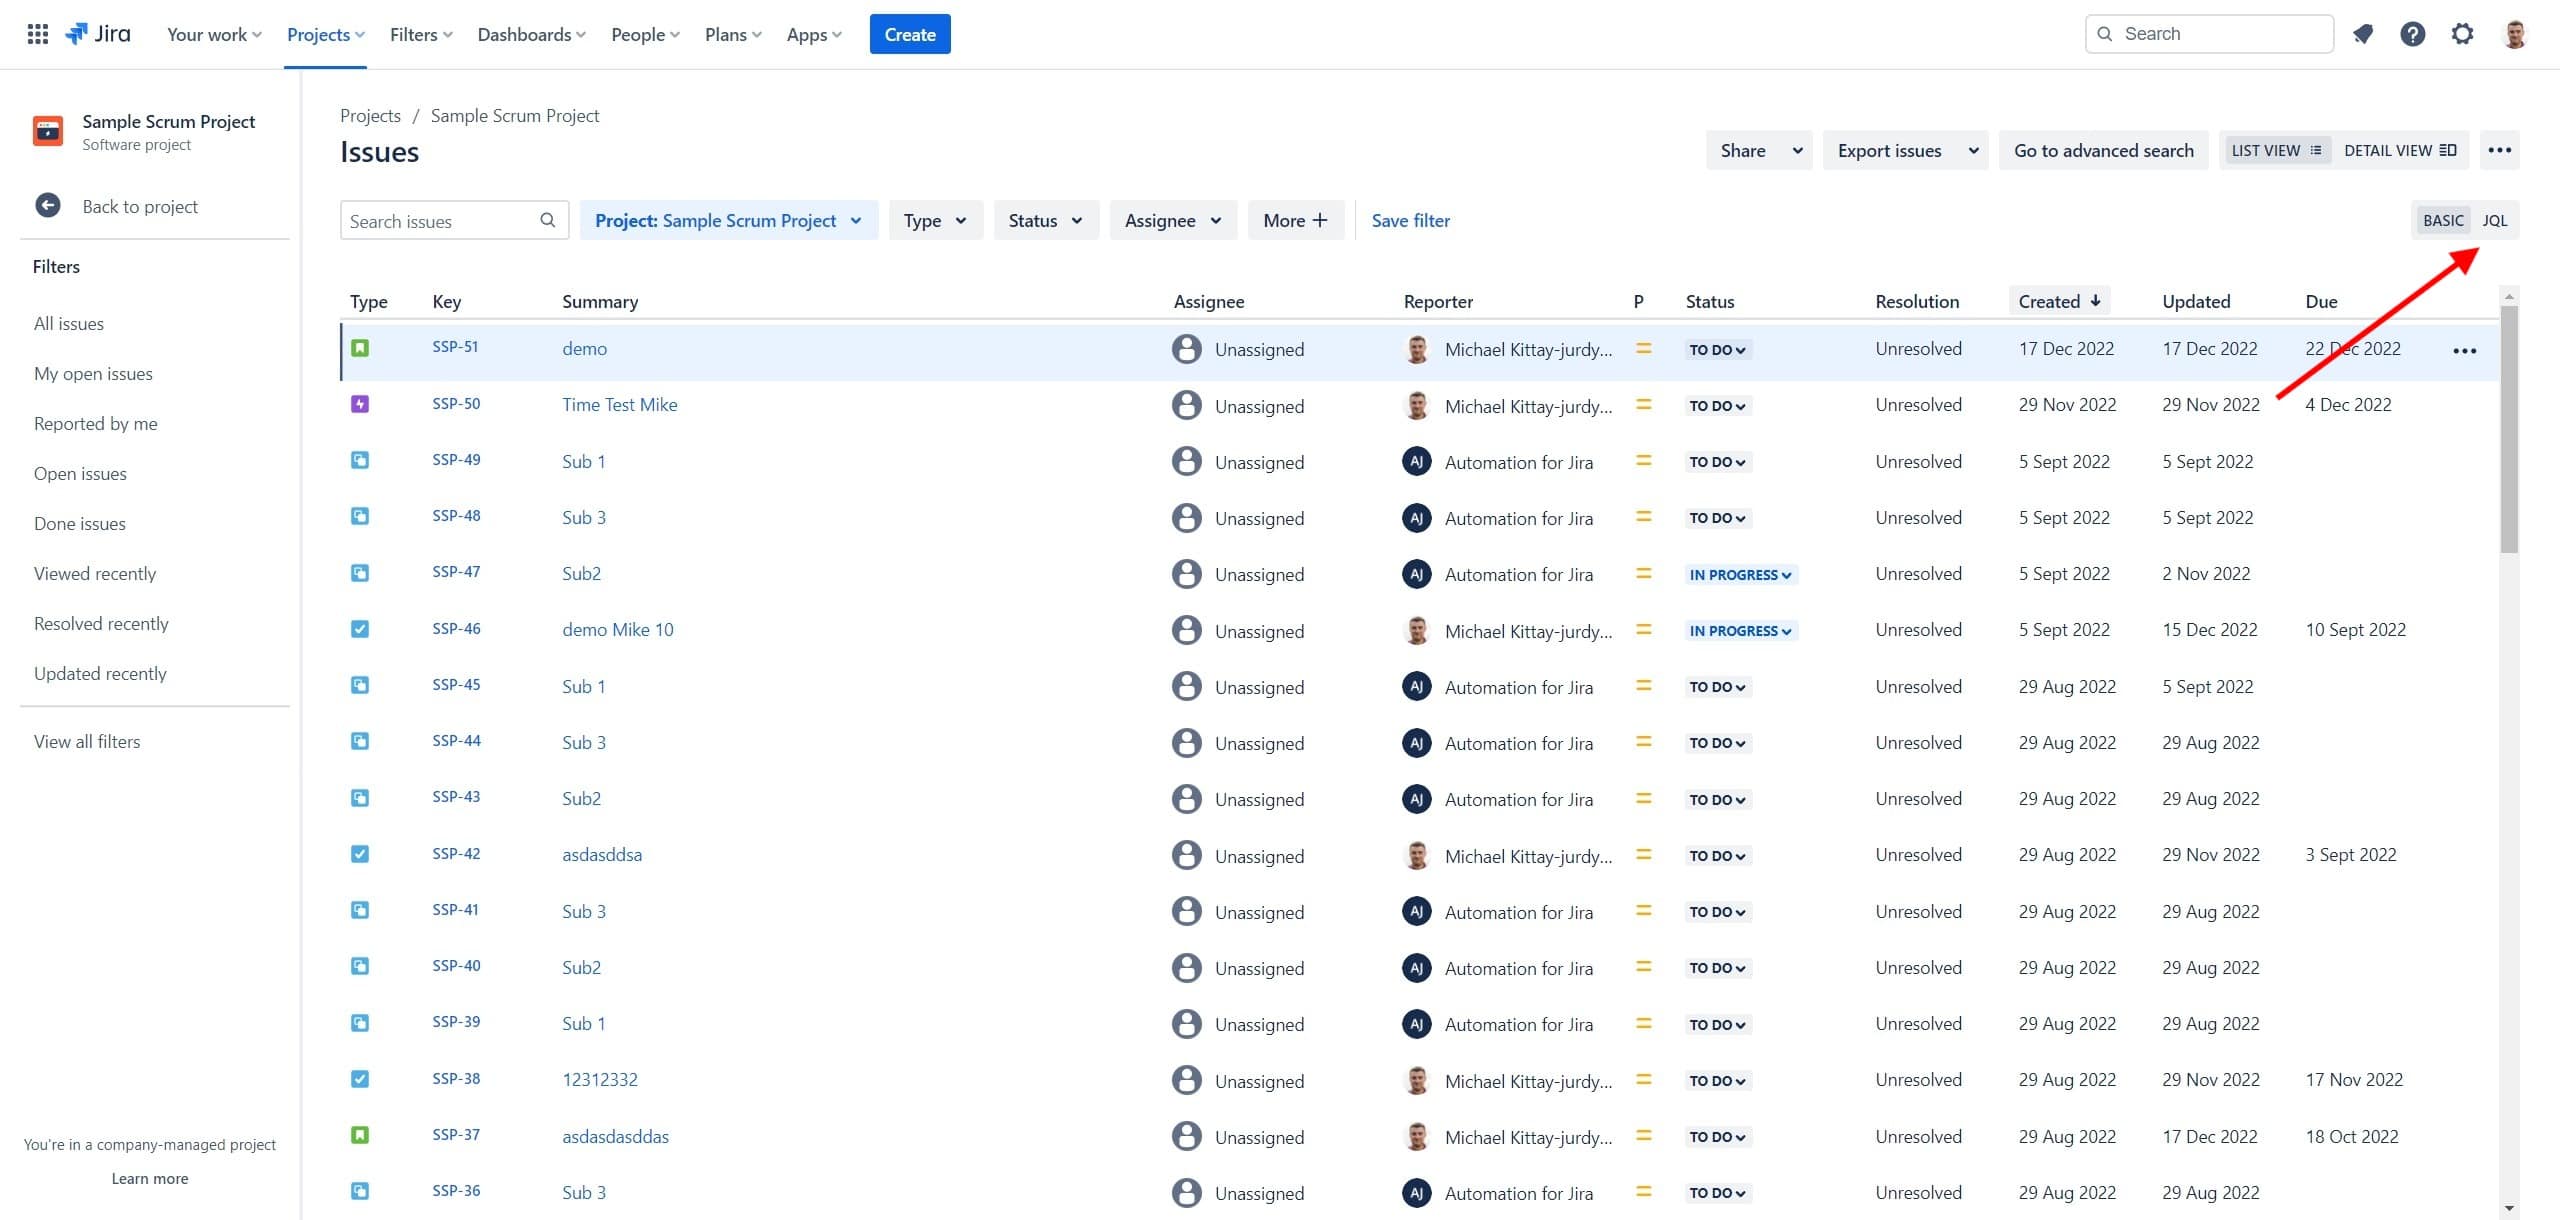
Jira Bulk Change
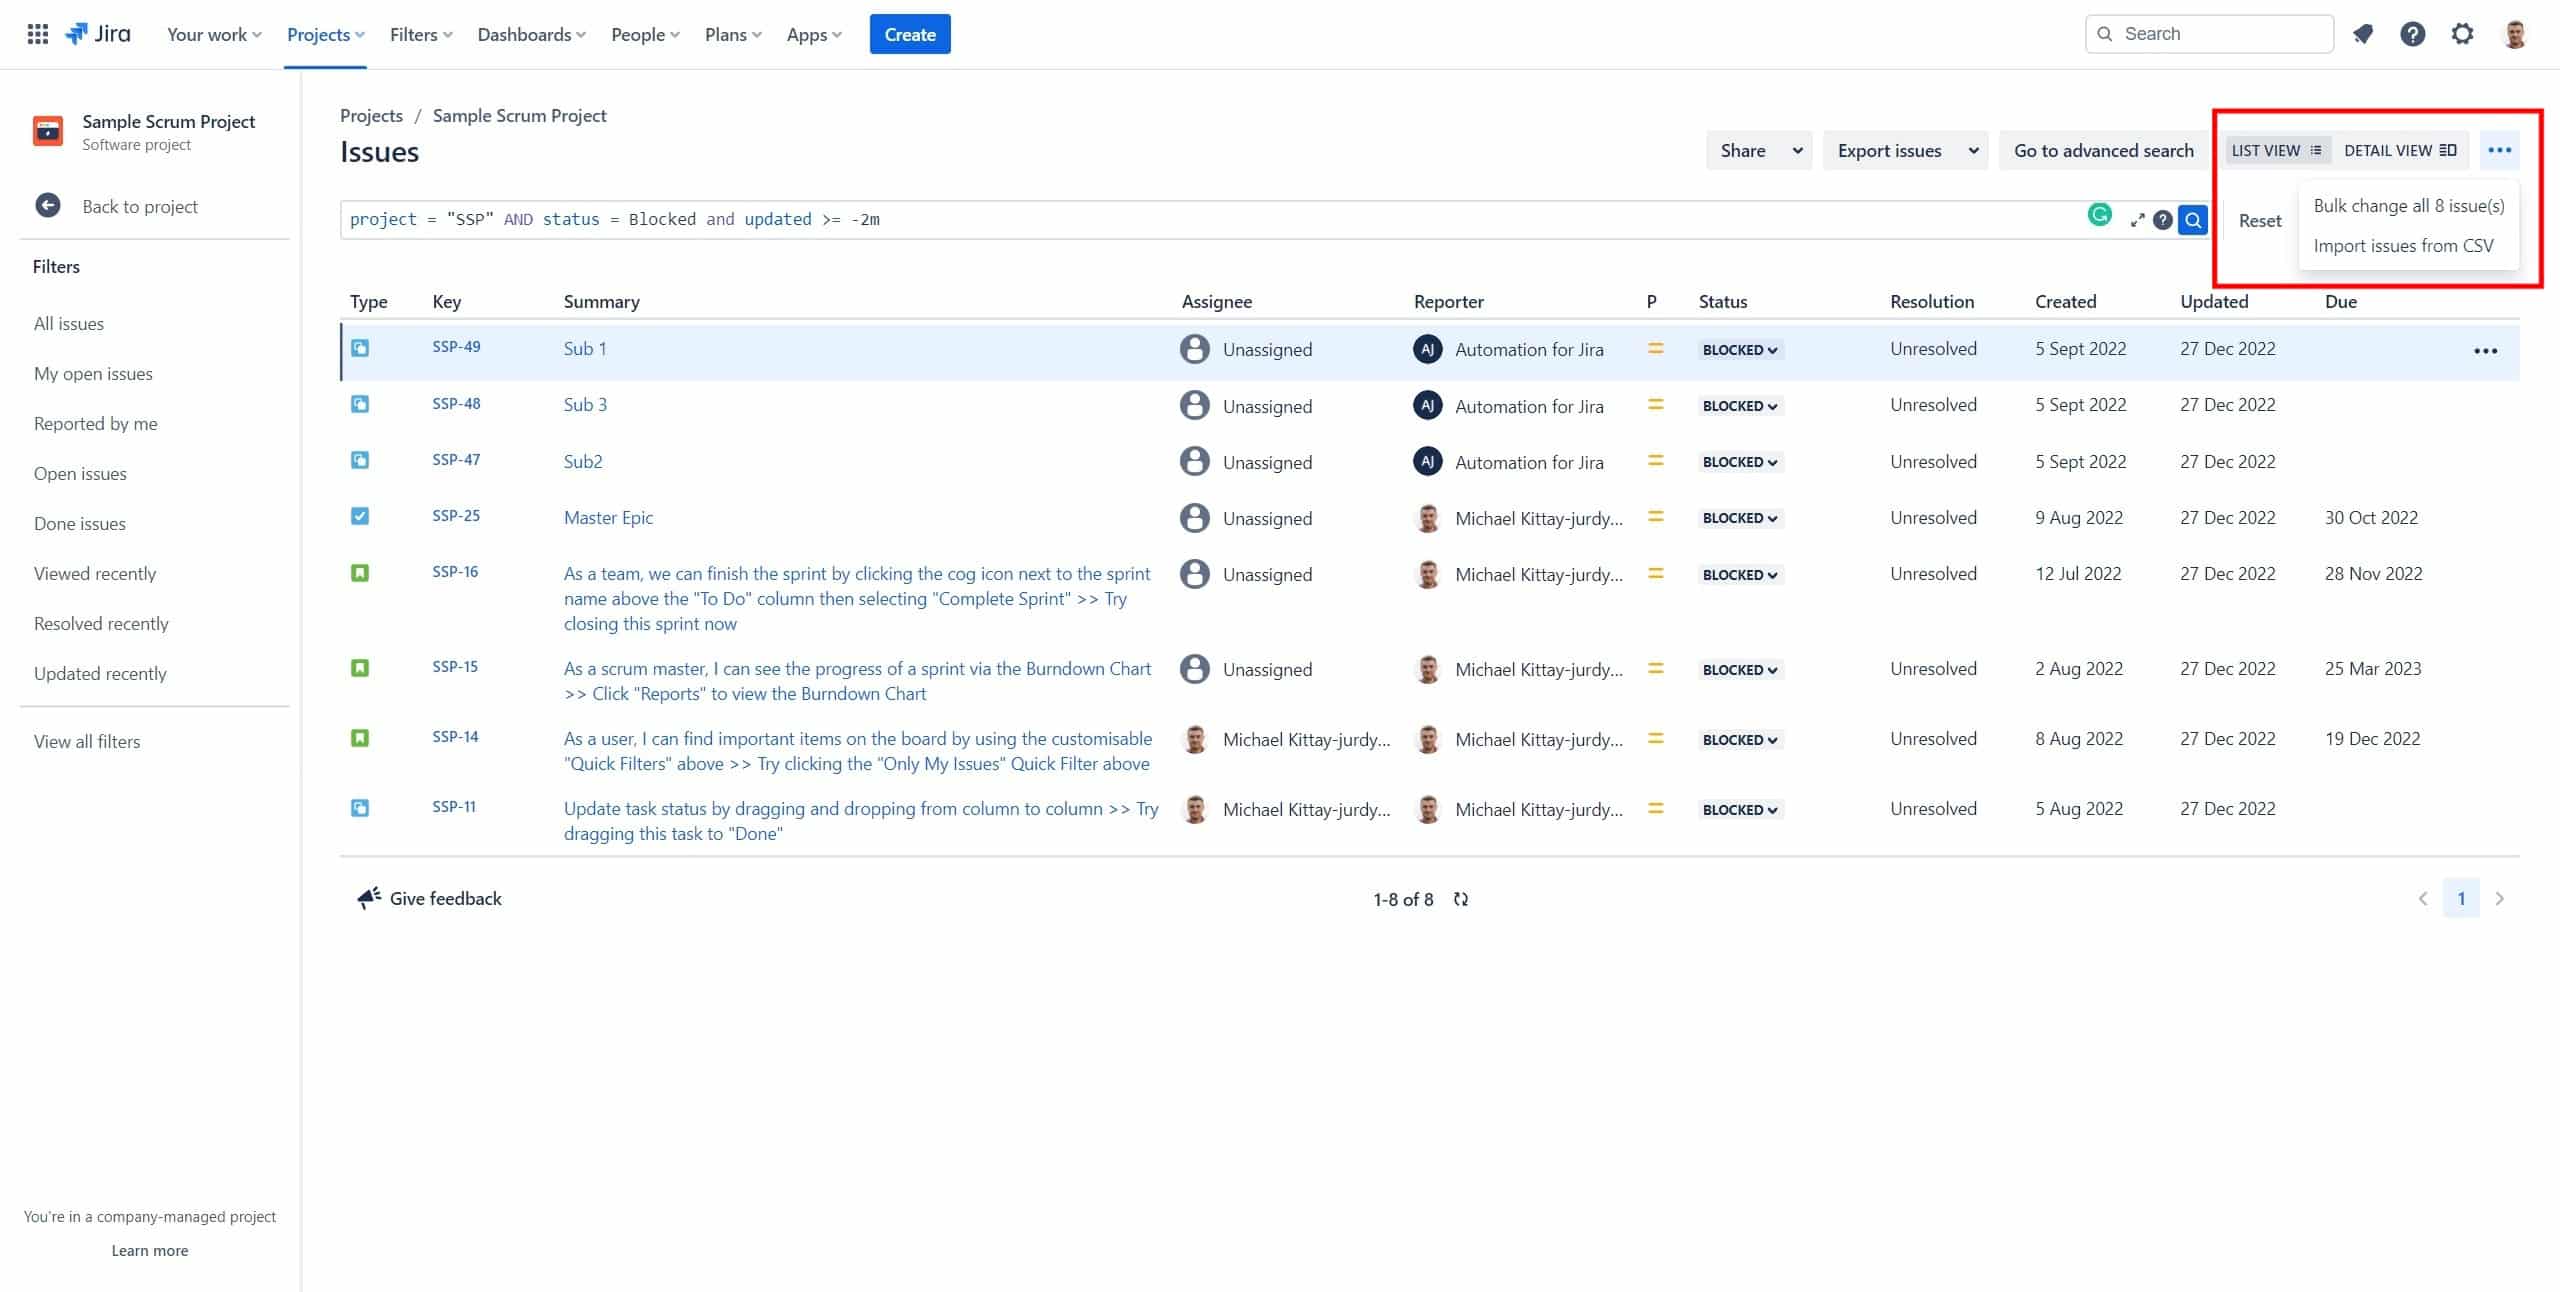
Use my JQL as an example. Of course, the project key will be different in your case.
project = “SSP” AND status = Blocked AND updated >= -60D
You can save this filter, but you don’t have to.
Now, move to use the “meatballs” menu (3 dots on the right top section) and click on Bulk Change.
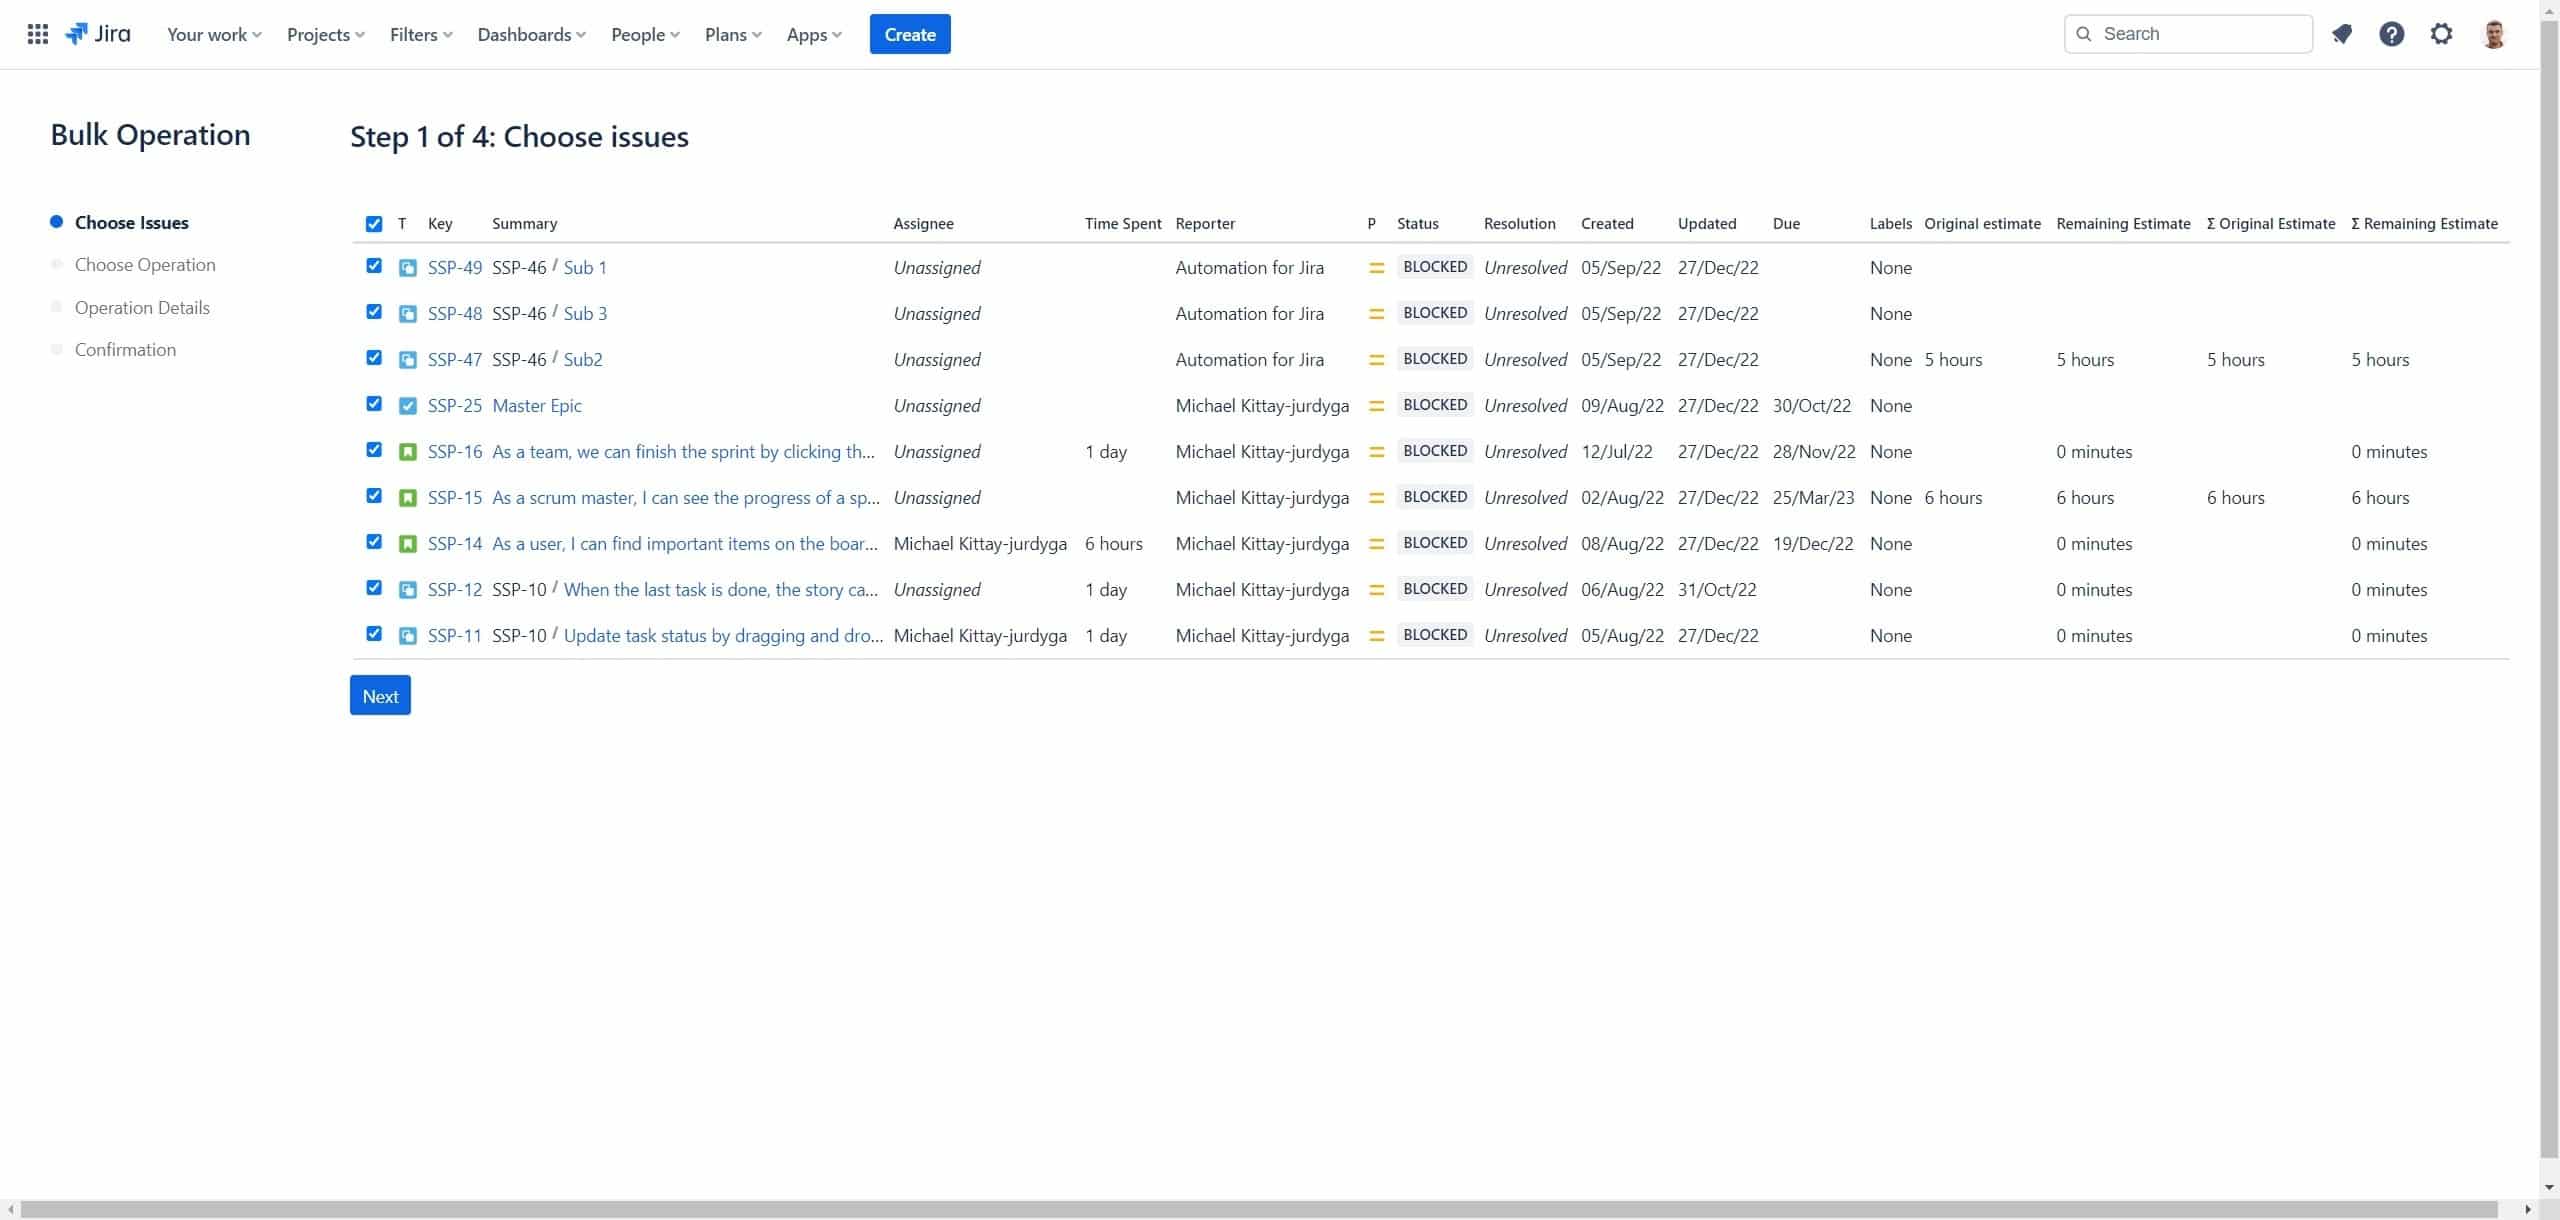
I only have 7 tickets, but that’s fine. Select all and go for next.
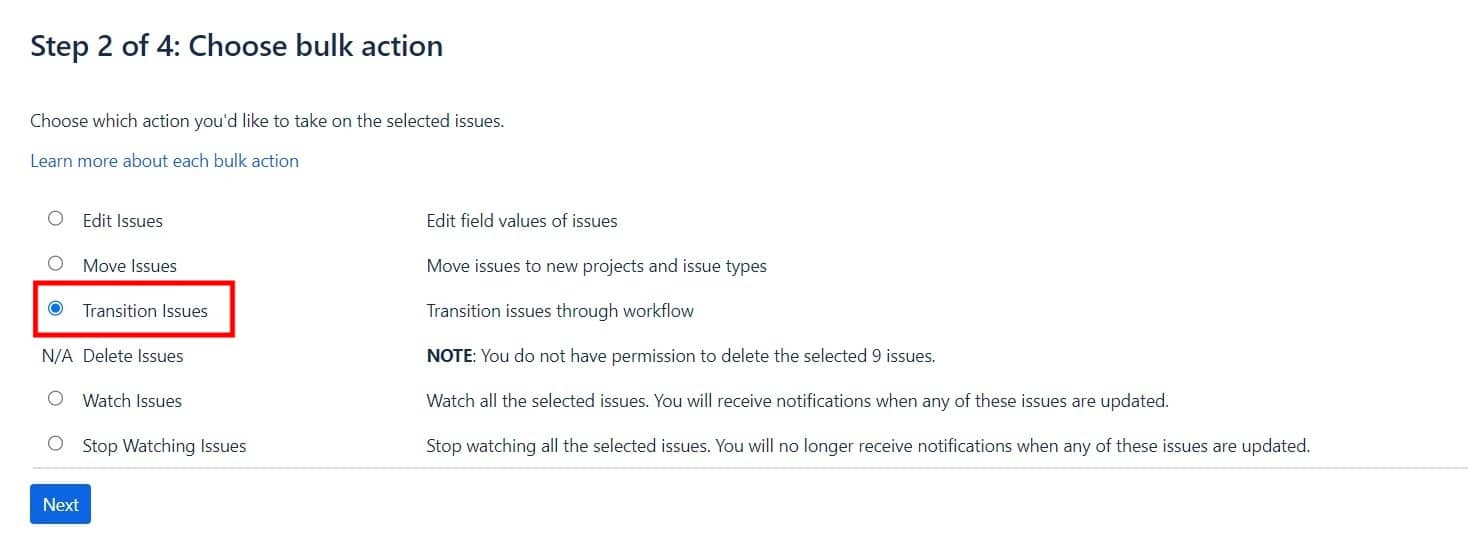
Now, select Transition Issues.
And now select your new destination – in my case, Done.

And that’s it.
Of course, you can do much more than move tickets from one status to another. That’s why I highly recommend having some fun with Bulk Change. So what else can we do?
Some everyday actions you might want to perform using bulk Change include:
- Changing the status of multiple issues
- Assigning multiple issues to a specific team member
- Adding or removing labels from multiple issues
- Adding or removing a specific component from multiple issues
- Changing the priority of multiple issues
- Setting the due date for multiple issues
Of course, not all actions are available for all types of issues. For example, you might not be able to change the status of a bug in the same way you can change a task’s status.
Overall, Bulk Change are a helpful tool for managing large volumes of work in Jira. They can help you streamline your workflow and save time so that you can focus on the important tasks at hand. So, it’s always a good idea to familiarize yourself with the tool available in Jira and mix usage with Automation whenever possible.
Let me know in the comments if you have any other examples so I can add it to this post.
