Jira Issue Collector: A Comprehensive Guide for Efficient Tracking
Jira is a powerful project management and issue tracking tool that many teams and organisations rely on. One useful feature in Jira is the Issue Collector, which allows you to embed a Jira feedback form into your own website. By using the Issue Collector, visitors can submit issues or suggestions directly from your site, eliminating the need for manual issue creation.
|
Setting up the Jira Issue Collector is simple. It can be embedded via HTML or JavaScript, and the form is typically accessed by clicking a ‘trigger’ tab exposed along the edge of pages on your website. Customisation options are also available, allowing you to tailor the look and behaviour of the Issue Collector to suit your needs and preferences.
Key Takeaways
- I discuss the Jira Issue Collector and its benefits for collecting user feedback
- I explain how to set up and deploy the Issue Collector on a website
- I cover options for customising and managing the Issue Collector for optimal results
Deploying Jira Issue Collector
As a Jira user, I know that deploying the Jira Issue Collector can greatly improve the efficiency of my team’s project management. In this section, I will guide you through the process of creating, configuring, embedding, and customising the Issue Collector for your projects.
Create and Configure
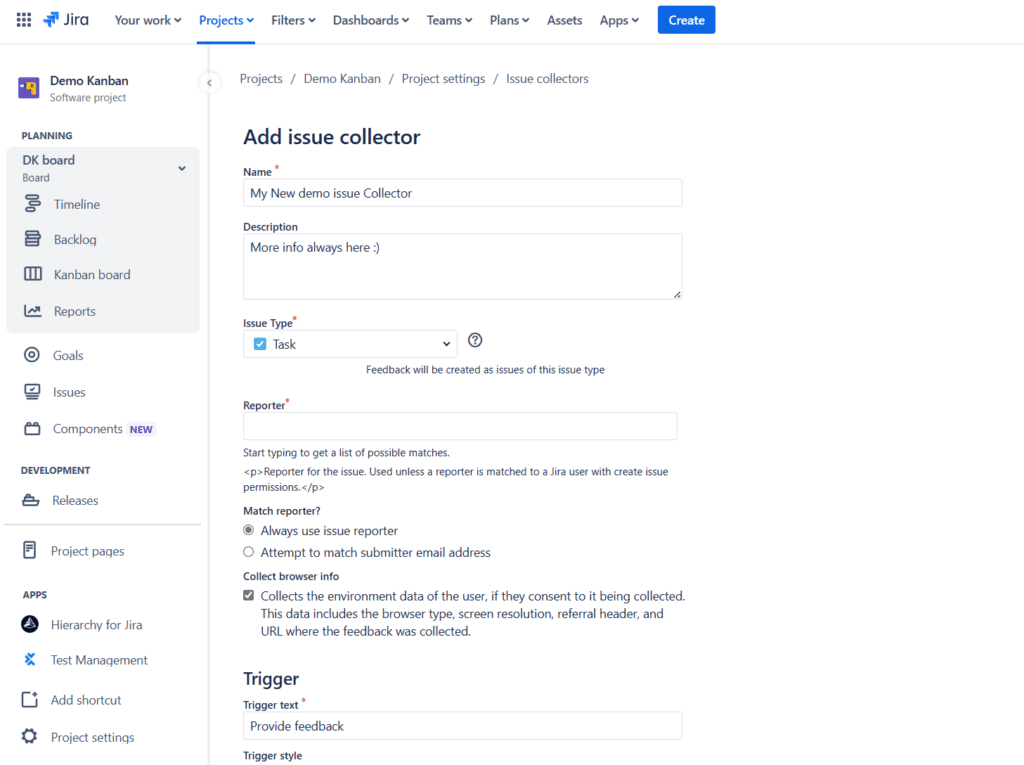
Creating and configuring the Jira Issue Collector is simple and straightforward. First, go to your Project Settings in the Jira system and find the Issue Collector option. Click on the “+ Add issue collector” button to get started. A configuration form will appear allowing you to specify your requirements for the Issue Collector. It is important to configure the collector accurately to ensure that it effectively addresses the needs of your project.
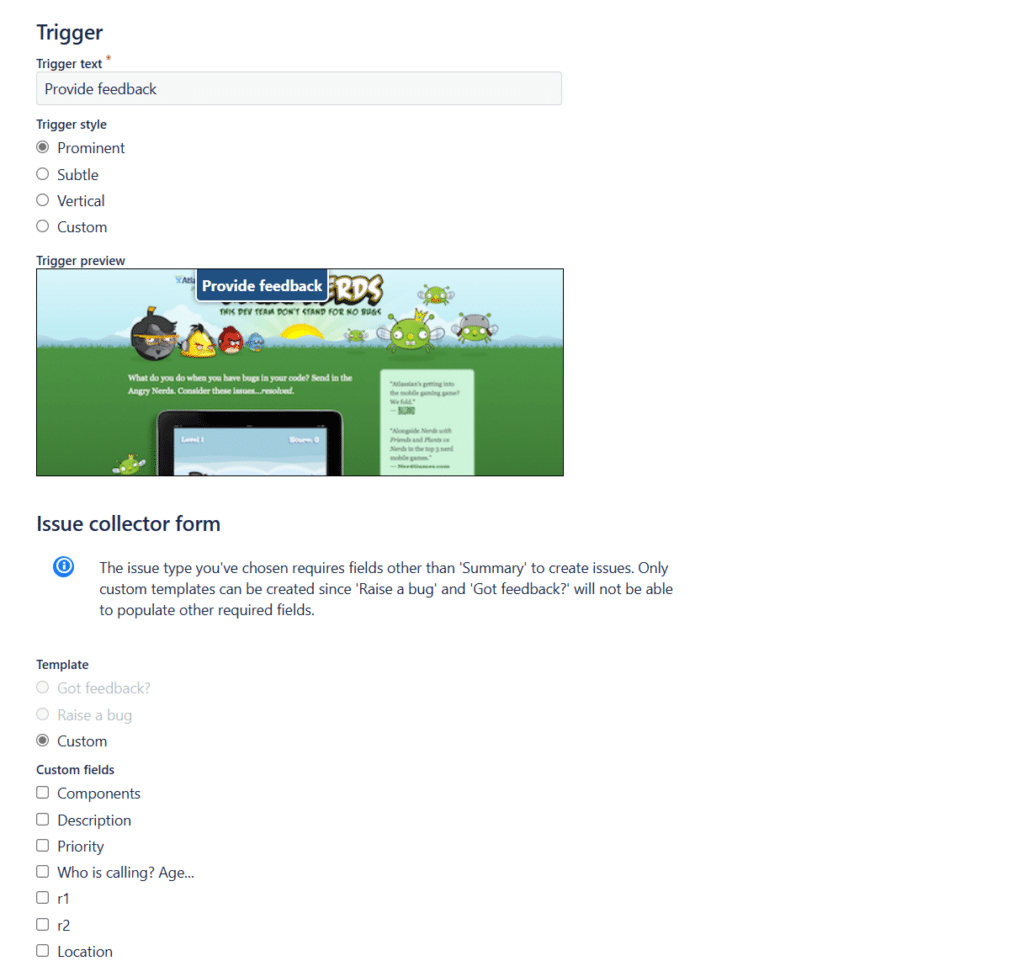
There are various options available for configuration, including setting up a custom trigger. A custom trigger can make it easier for website visitors to access the form, fill it up, and submit their feedback or issues. The Trigger Style and Custom Trigger Style options allow you to choose the appearance and functionality of the trigger, adapting it to your preferred design or user experience.
Embedding and Customisation
Once the Issue Collector is configured, I can embed it into my website using the single line of JavaScript generated by the Jira system. This script should be placed in the relevant section of your website’s HTML. After embedding the Issue Collector, I can leverage additional JavaScript functions to customise it further. The showCollectorDialog() function, for example, can be used to control when and how the Issue Collector appears to website visitors.
Additional customisation options, such as adjusting the colour scheme, text, and more, can help seamlessly integrate the Issue Collector into your website’s design. Jira offers various ways to personalise the Issue Collector to better suit your project’s requirements and ensure a consistent look and feel.
In conclusion, deploying the Jira Issue Collector can enhance your project management and provide valuable insights. By simply creating, configuring, embedding, and customising the collector, I can effectively address the needs of my team and stakeholders.
Navigating Jira Issue Collector Interface
In the Jira Issue Collector interface, I can easily navigate and make use of various features to customise the feedback form that I want to embed on my website. Let me share with you some of the key elements of this interface that I find essential while creating an issue collector.
Projects and Issue Types
When I create an issue collector, I first need to choose a Project where the issues will be collected. After selecting a project, I can also specify the Issue Type that I want to be created in Jira when visitors submit the feedback form. This helps me categorise the issues appropriately and manage them effectively within my project.
Form Elements and Types
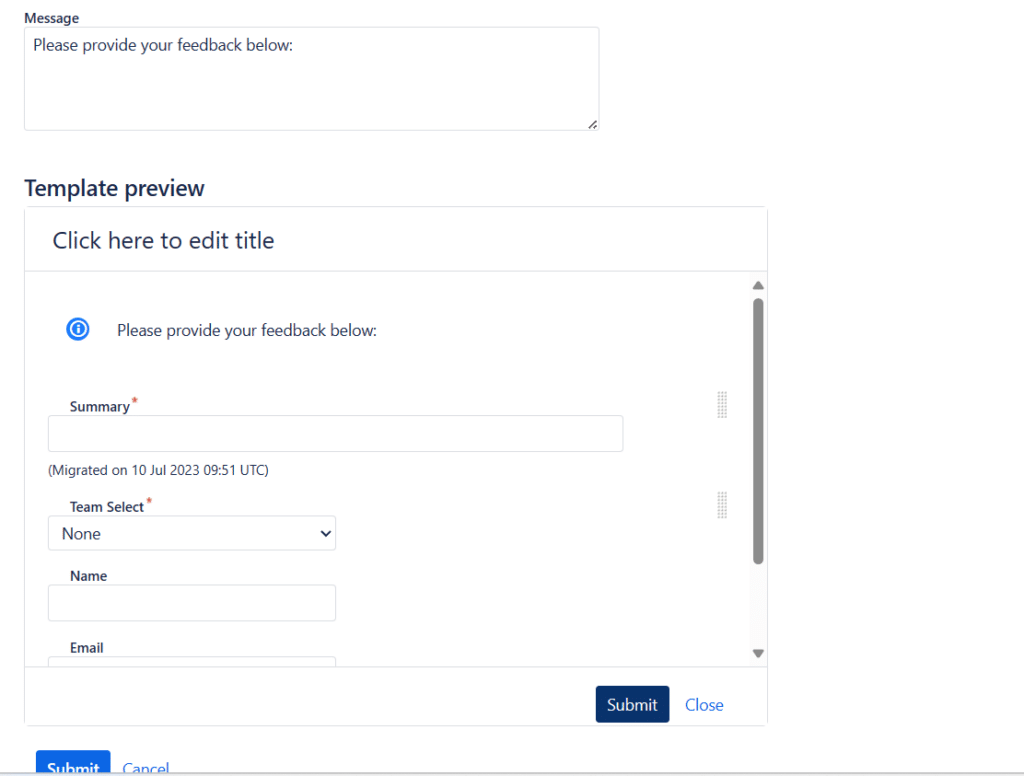
The Jira Issue Collector provides me with different form fields that allow me to gather relevant information from my website visitors. I find the following field types to be most useful:
- Summary: This is a mandatory field where visitors provide a brief description of the issue they are reporting.
- Text Field: Allows users to enter plain text.
- Select List: I use this to create a dropdown list of predefined options for visitors to choose from.
- Multi-Select: Similar to the Select List, but it allows users to choose multiple options.
- Cascading Select: This field type lets me create a two-level hierarchy of options for visitors to select.
- URL Field: A field where users can input a web address.
- Version Picker: I can use this to allow visitors to choose a project version related to their issue.
- Project Picker: This field type helps collect user selection of a specific project in Jira.
- Single Version Picker: Similar to the Version Picker, but only allows selection of a single version.
- Free Text Field: Gives visitors the flexibility to input detailed information in a multi-line text format.
To enhance the user experience of my website visitors, I also customise the Trigger of the feedback form. This can be done by modifying the tab’s appearance, position, and behaviour.
By making the best use of these features, I can effectively collect valuable feedback and manage issues through the Jira Issue Collector interface.
Managing Jira Issue Collector

As a Jira administrator, I find it crucial to effectively manage Issue Collectors to maintain an organised feedback system. In this section, I’ll discuss editing and deleting Issue Collectors, as well as updating and making changes to them.
Edit and Delete
To edit or delete an Issue Collector, first access the Administration area by clicking on the cog icon in the top right corner and selecting System. Once there, select Issue Collectors to open the Issue Collectors page, which shows a list of all existing issue collectors in my Jira system (source). By clicking on the name of a project, I can access a more detailed list of issue collectors belonging to that project. From there, I can click on the specific Issue Collector to access detailed information about it and make the necessary edits.
It’s important to update information such as the Issue Collector name, triggering options, and the destination project as needed. Once I’ve made the required changes, I can click Update to save them. If I need to delete an Issue Collector, I can do so by clicking the Delete button on the same page.
Updates and Changes
As a Jira admin, it’s my responsibility to ensure that the Issue Collectors on my website are up-to-date and continue to serve their purpose effectively. To do so, I need to be aware of any changes to the website that may affect the Issue Collector’s functionality. This can include updates to the website’s design, content, or even its URL.
To update my Issue Collector, I can follow the same steps mentioned earlier to access its settings. Once there, I can make the necessary changes, such as modifying the Issue Collector’s appearance or trigger settings. After making these updates, I may need to copy the updated HTML or JavaScript code and replace the existing code on my website to ensure the changes are reflected correctly. This way, I can maintain a seamless integration of the Jira Issue Collector into my website.
In conclusion, managing Jira Issue Collectors effectively is crucial for maintaining an efficient feedback collection process. As a Jira administrator, I must stay on top of any updates, changes, and edits to ensure that my Issue Collectors continue to serve their intended purpose.