

Most people confuse workflow conditions with validators. Big mistake.
If you’ve watched my validator tutorial, you know validators check things during the transition process—they work with screens and can block actions on the fly. Conditions are completely different, and understanding this difference will save you hours of workflow frustration.
Conditions don’t care about screens. They check the current state of your ticket and decide whether a transition button even appears. Think of it this way: validators say “you can’t do this because X,” while conditions say “you can’t even see this option because Y.”
Here’s a real-world example: maybe only Scrum Masters should be able to resolve tickets, or perhaps tickets can only move to “Done” when a specific custom field has the right value. That’s where conditions shine.
The beauty of conditions is that they’re invisible to users who don’t meet the criteria. No error messages, no failed transitions—the button simply doesn’t exist for them. It’s clean, intuitive, and prevents confusion.
I’m going to show you exactly how to set up field value conditions (the most common type), test them properly, and explain when to use conditions versus validators. By the end, you’ll know which tool to reach for in any workflow scenario.
Understanding Validators vs Conditions 🔍
Before we jump into the practical steps of setting conditions, it’s essential to understand the difference between validators and conditions in Jira workflows. Both play a crucial role in managing workflows effectively, but they serve different purposes.
- Validators: These are designed to work with screens, allowing you to check parameters on the fly. For instance, if you require a specific field to be filled out before a transition occurs, validators can enforce this rule during the transition process.
- Conditions: In contrast, conditions cannot be set during a transition. They must be established from the ticket level, determining whether a ticket can proceed to a particular status based on predefined criteria.
In this tutorial, we’ll focus primarily on how to set conditions, particularly with the example of setting a custom field value.
Setting Up Your Jira Project 🛠️
First things first, let’s navigate to your Jira project settings. This process is straightforward and applicable whether you’re using a Scrum or Kanban board. Here’s how to get started:
- Open your Jira project.
- Navigate to Project Settings.
- Click on Workflows.
- Select the workflow you wish to edit.
- For this tutorial, we’ll use the diagram view to make adjustments.
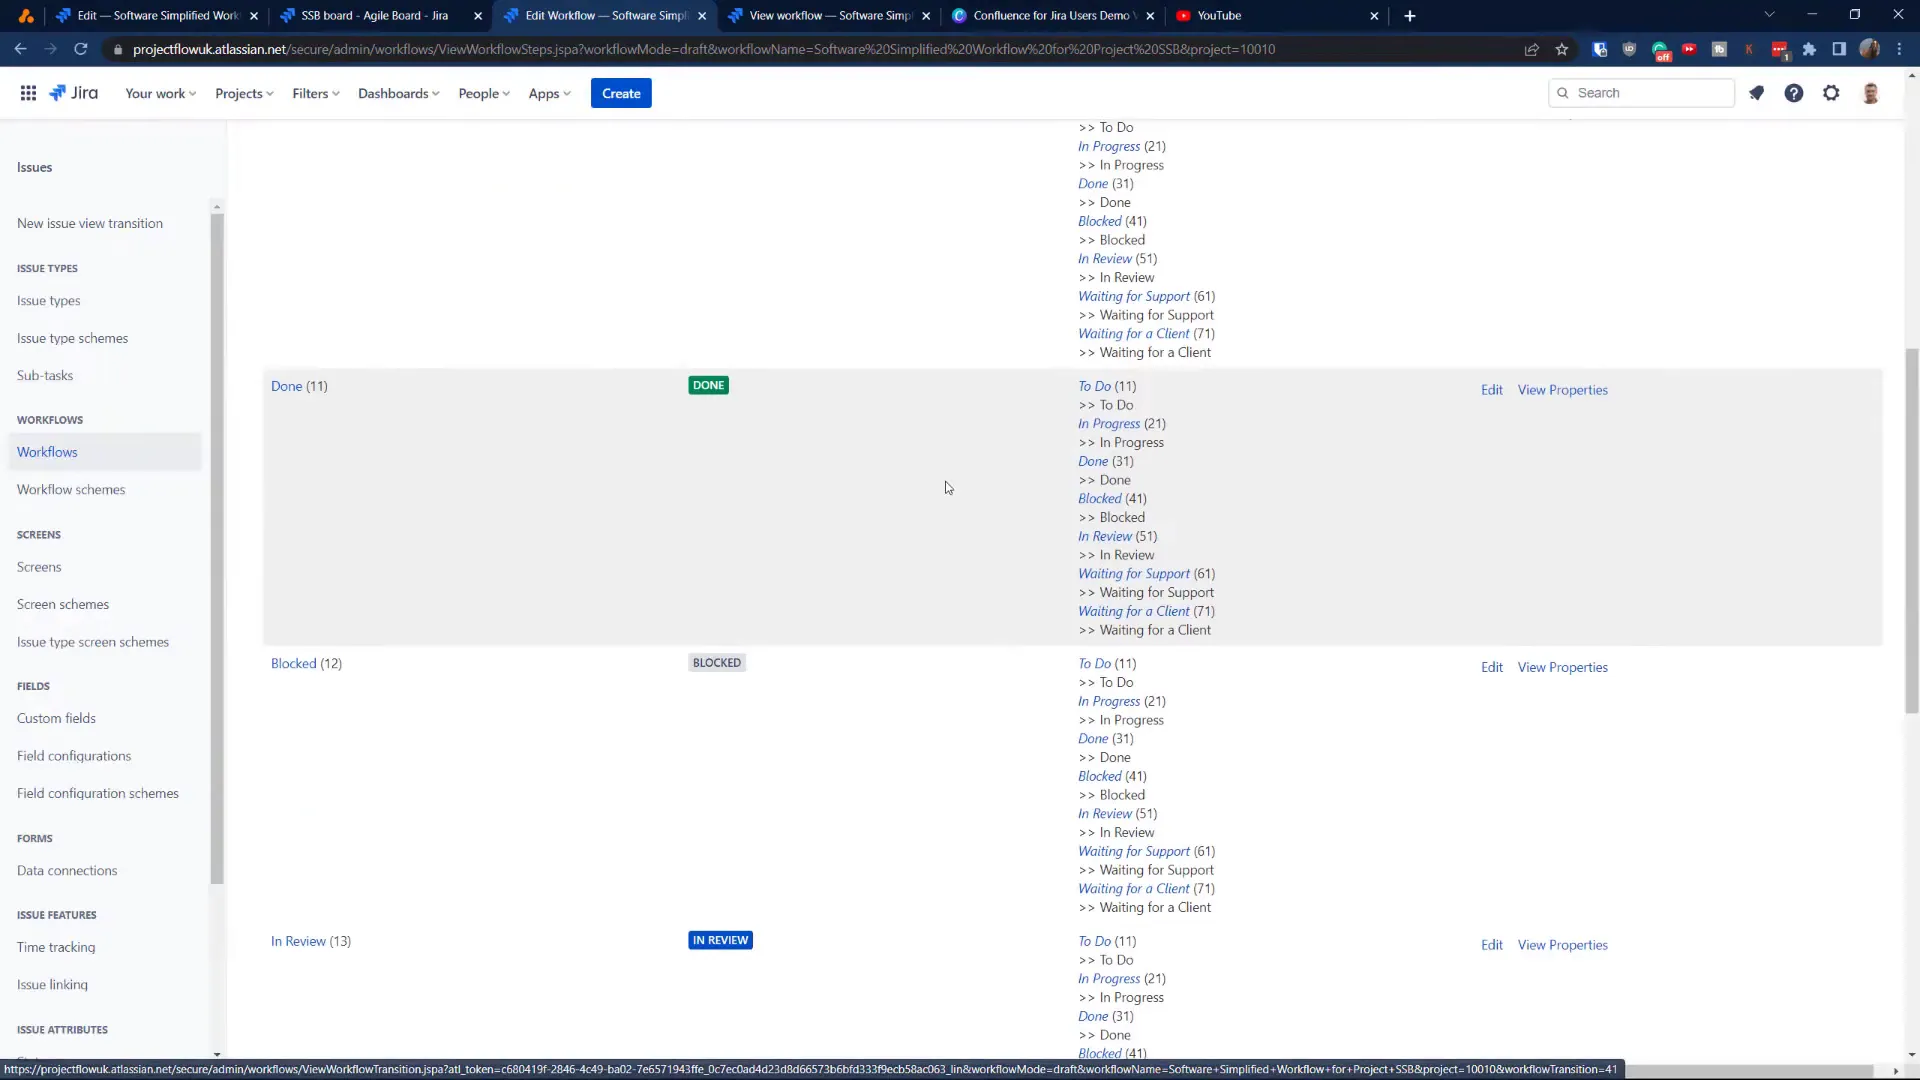
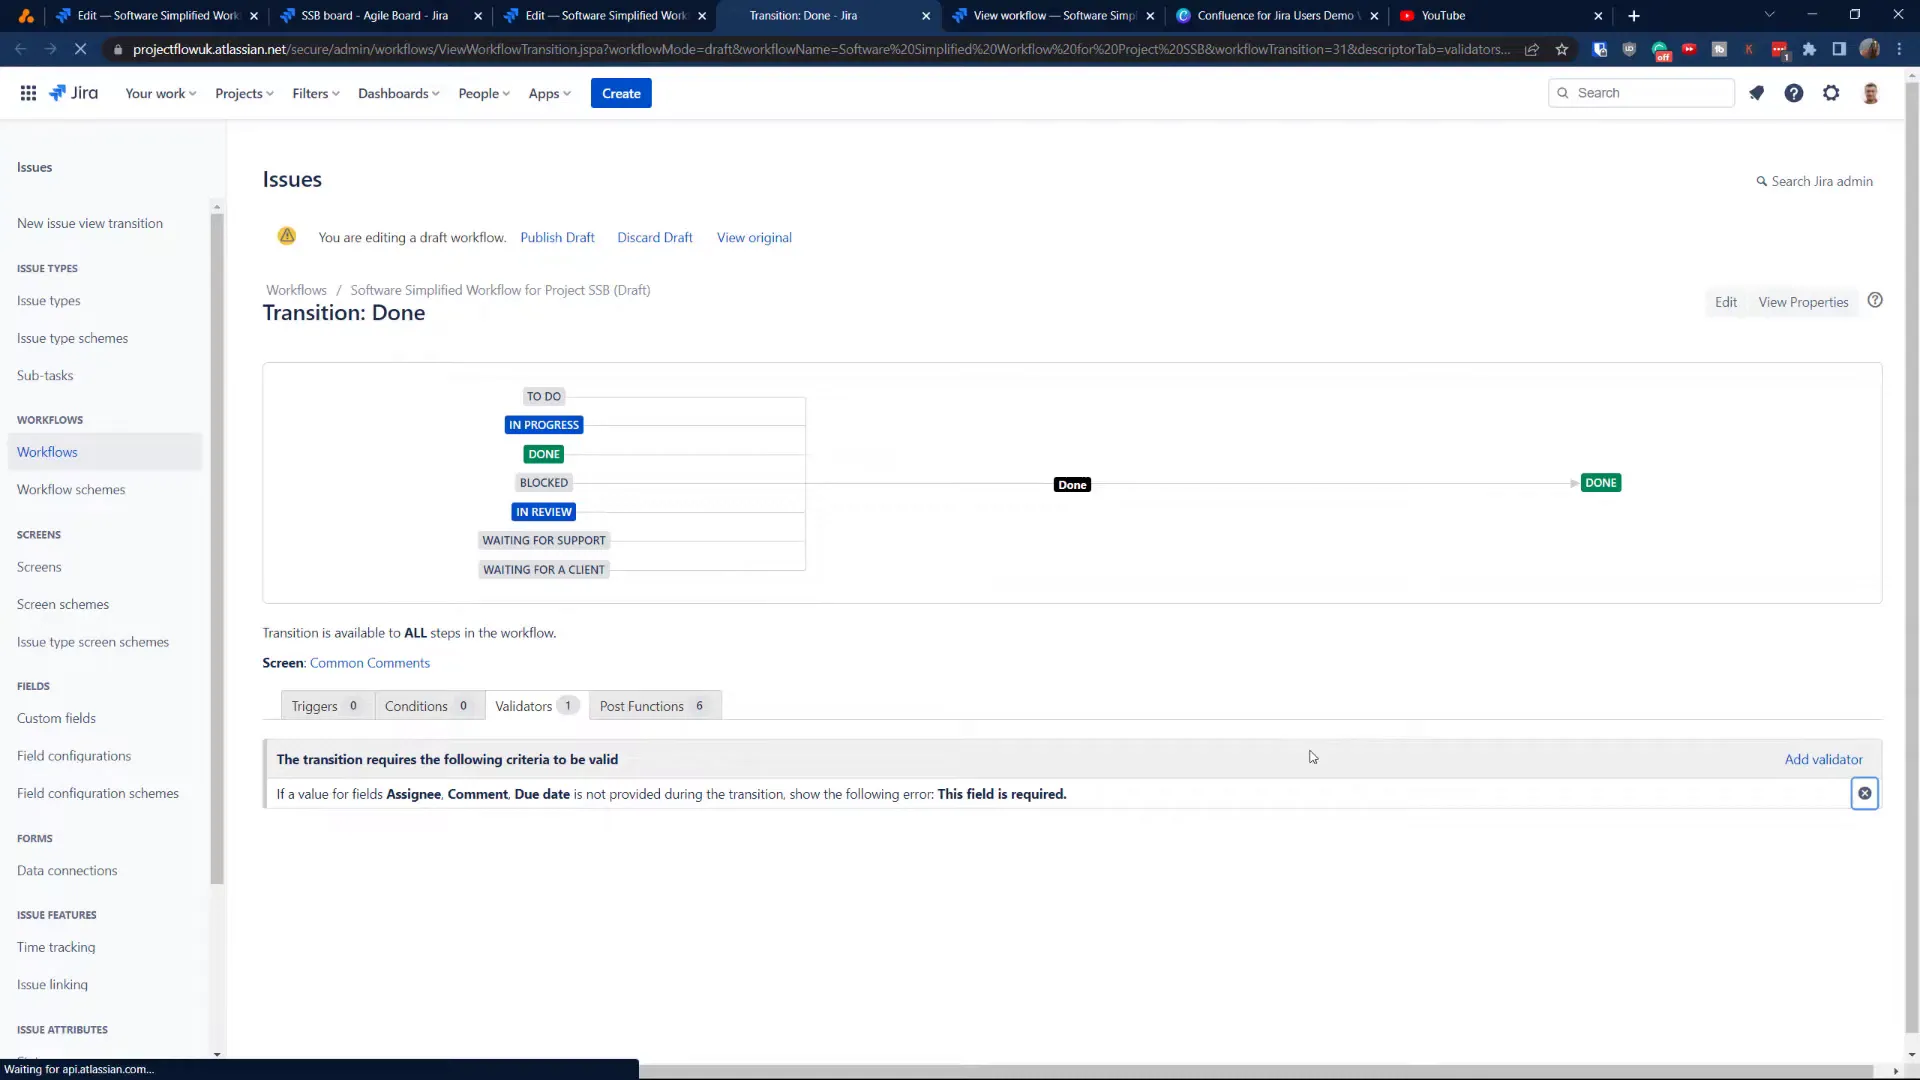
Once you’re in the workflow editor, you’ll see various transitions. For demonstration purposes, let’s focus on the “Done” transition. We’ll be adding a condition that restricts progress based on a specific field value.
Removing the Validator 🗑️
Before adding our condition, we first need to remove any existing validators. This step ensures that our demonstration is clear and focused solely on the conditions.
- In the workflow editor, locate the transition for “Done”.
- Click to edit the transition.
- Remove any existing validators associated with this transition.
Adding a Condition to Your Workflow 📋
Now that we’ve cleared the validators, it’s time to add our condition. This will restrict the transition based on the value of a custom field, such as the “Department” field.
- In the transition settings, navigate to the Conditions tab.
- Click on Add Condition.
- Select the condition type that suits your needs. For our example, we’ll choose Field Value Condition.
- Specify the field you want to evaluate. In this case, select “Department”.
- Set the condition, such as “Department must be equal to ‘Dev’”.
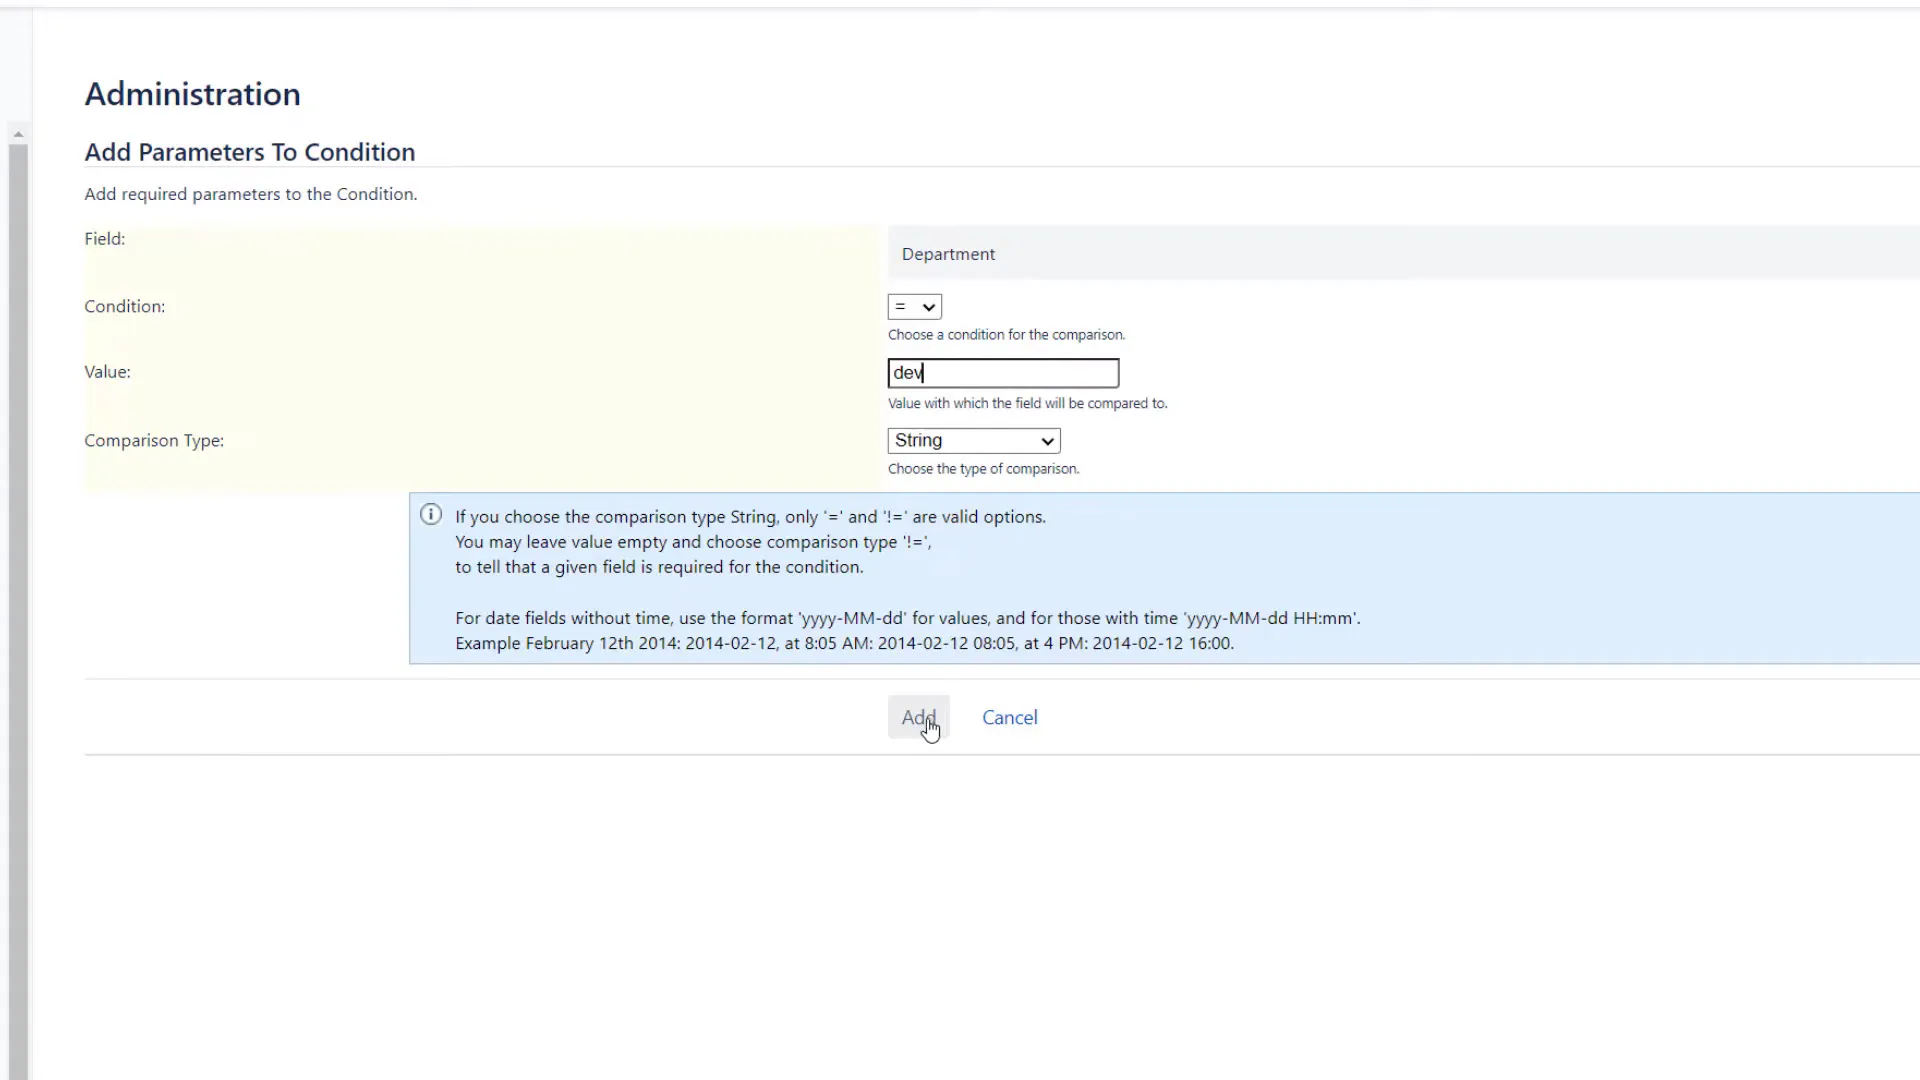
This condition means that only tickets with the “Department” field set to “Dev” can transition to the Done status. Once you’ve configured this, make sure to publish your changes!
Testing Your Condition ✅
With the condition successfully added, it’s time to test it. Here’s how:
- Return to your project and locate a ticket that you can manipulate.
- Change the “Department” field to a value that does not match your condition (e.g., “ABC”).
- Attempt to transition the ticket to “Done”.
- You should see an error message indicating that the transition is blocked due to the condition.
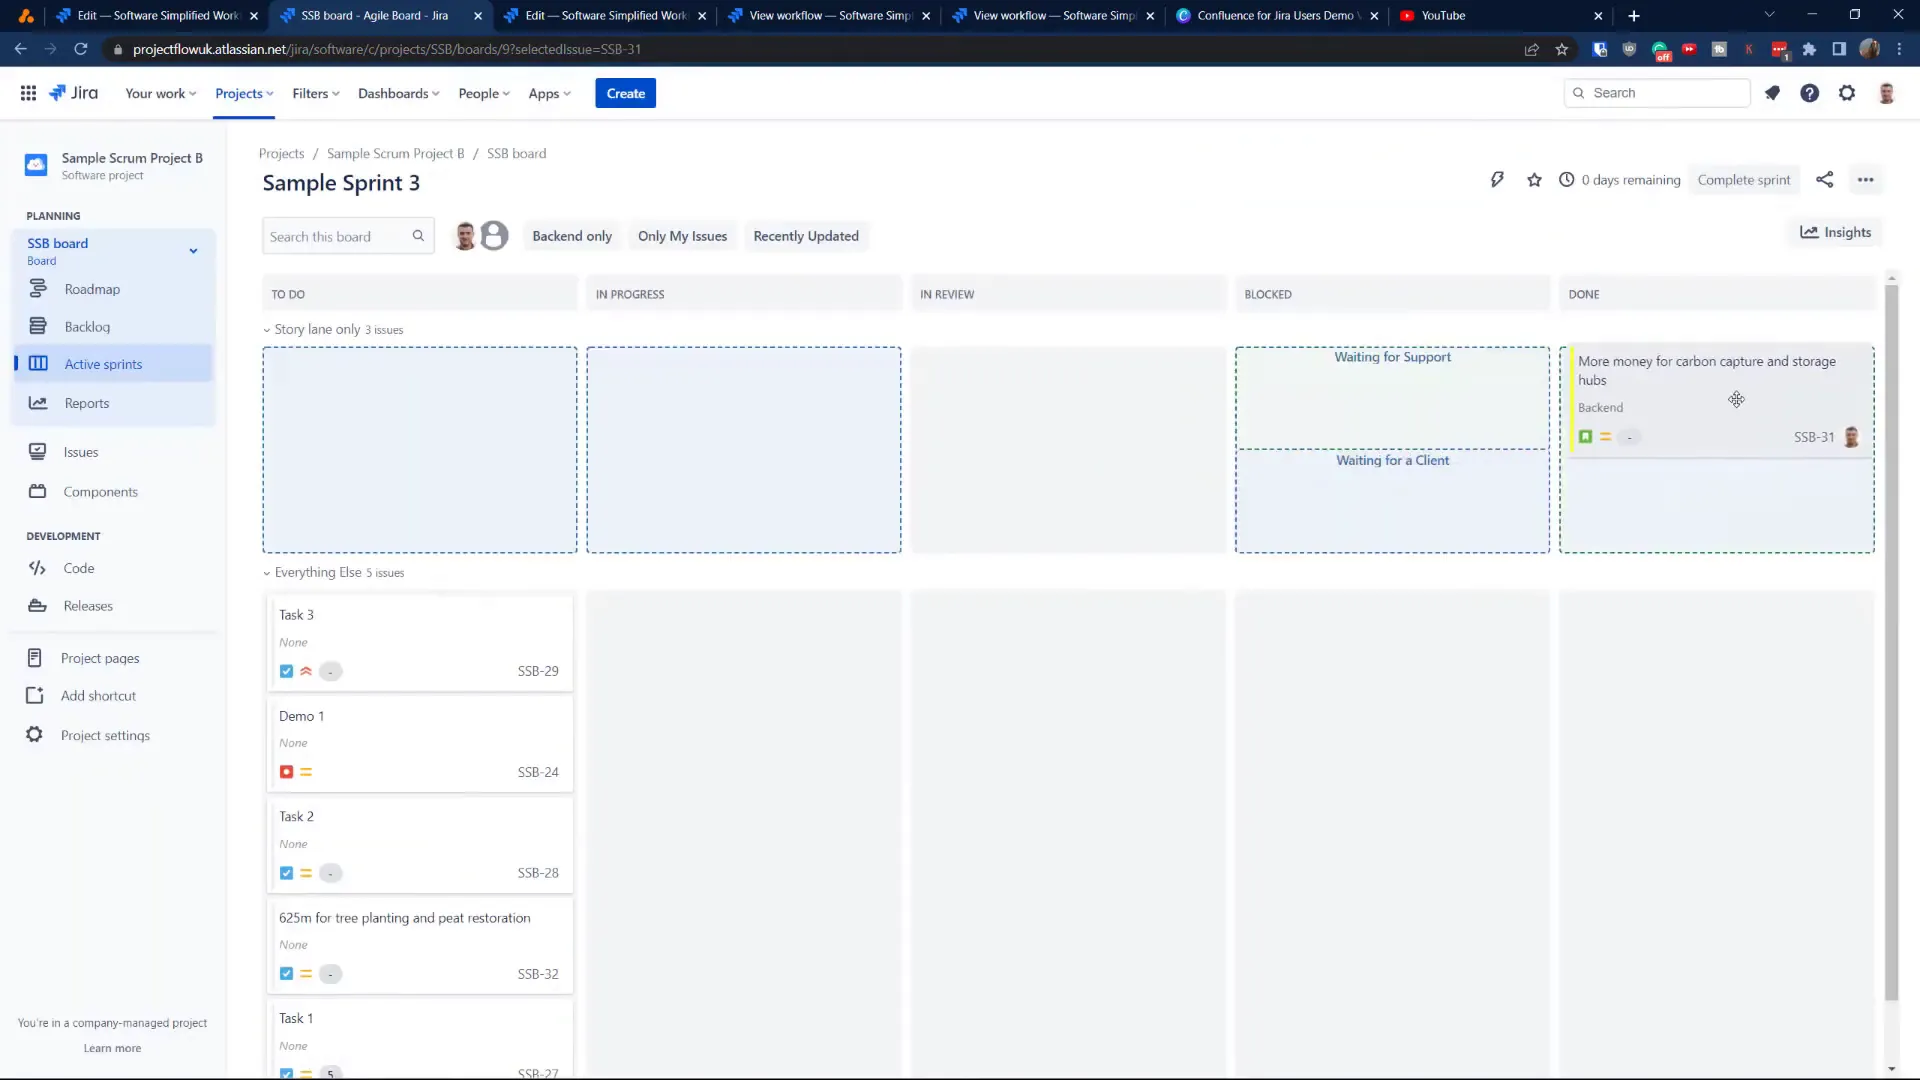
Now, change the “Department” field back to “Dev” and try transitioning again. This time, the transition should succeed, demonstrating how conditions can effectively manage workflow progress.
Real-Life Examples of Conditions in Jira 🔑
While the field value condition is a great start, there are numerous ways to utilize conditions in real-life scenarios. Here are a few examples:
- Permission Conditions: Limit transitions based on user roles. For instance, only a Scrum Master or project manager can resolve tickets.
- Group-Based Conditions: Require that only certain user groups can perform specific transitions, enhancing workflow security.
- Advanced Conditions with Script Runner: If you have access to Script Runner, you can implement even more complex conditions using JQL queries.
These examples highlight the flexibility of conditions in customizing your Jira workflows to fit your team’s needs.
FAQs About Jira Conditions ❓
What is the main difference between validators and conditions in Jira?
Validators are used to check conditions on screens during transitions, while conditions determine whether a transition can occur based on ticket-level criteria.
Can I use conditions in next-gen projects?
Currently, conditions are more robust in classic projects. It’s worth checking if newer features have been added to next-gen projects, as Jira frequently updates its capabilities.
How can I learn more about Jira workflows?
For more insights, consider exploring resources available on the Project Flow Academy website, where you can also book a free discovery call for personalized assistance.
Conclusion: Mastering Jira Workflows 🎓
By understanding and implementing conditions in your Jira workflows, you can significantly enhance your project management processes. This tutorial not only provided you with a step-by-step guide but also equipped you with real-life examples that can be adapted to fit your specific needs.
Don’t forget to explore more about Jira features and stay tuned for our upcoming tutorials, where we’ll dive into field configuration and advanced workflow management techniques. Your journey to mastering Jira starts now!
For more tutorials and resources, be sure to check out the Project Flow blog. Happy JIRA-ing!