JSM Assets Management: Complete Tutorial for 2026

Consultant reality check: I've implemented Assets for organizations ranging from 10-person startups to enterprises like the NHS. Here's what most people don't tell you—Assets can save you serious money. I recently helped a client replace three separate asset tracking systems with JSM Assets. Their savings? Nearly £10,000 per year. Yes, Premium is expensive, but if you're currently juggling multiple tools, the ROI is real.
New to JSM? Start with What is JSM.
Let's dive into everything you need to know about JSM Assets in 2026.
What's New in JSM Assets for 2026
Before we get into the tutorial, here are the major updates Atlassian rolled out:
✅ Full Assets API Access - You can now programmatically manage assets via API (I'll be publishing Python scripts for this soon)
✅ CSV Import - Bulk import assets using CSV files, and surprisingly, it works really well
✅ Asset Templates - Pre-configured templates to speed up deployment
✅ Improved Reports - Redesigned reporting engine (still has limitations, but better than before)
✅ Dedicated Dashboards - Brand new feature for asset visualization and tracking
These updates make Assets significantly more powerful than previous versions.
What Is JSM Assets?
JSM Assets is Atlassian's Configuration Management Database (CMDB) solution. It lets you:
- Track IT equipment (laptops, phones, servers, licenses)
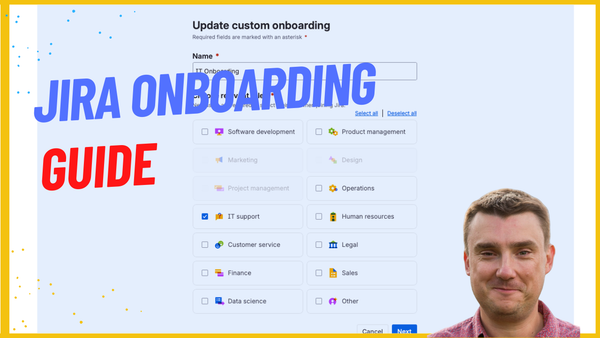
- Manage employee onboarding/offboarding
- Link assets to service requests
- Build relationships between configuration items
- Monitor asset lifecycle from purchase to retirement
Assets are critical for secure offboarding - tracking equipment returns.
See Assets in action in my Onboarding with Assets tutorial.
The bottom line: If you need to know what equipment you have, who has it, and where it is, Assets solves this problem.
My Real-World Use Case: Complete Onboarding System
Let me share a recent implementation that shows the power of Assets.
Client situation: Mid-sized company with chaotic equipment tracking. They were using three separate tools and still didn't know where half their laptops were.
What we built:
- Full onboarding/offboarding system in JSM
- Assets database tracking all equipment
- Python scripts for automated updates
- Automations connecting requests to asset allocation
Results:
- Complete visibility into equipment location
- Automated asset assignment during onboarding
- Automated recovery tracking during offboarding
- £10,000/year savings from consolidating tools
- Eliminated "ghost equipment" (devices nobody could locate)
The key insight: Even smaller organizations can benefit from proper asset control. You don't need to be an enterprise to justify this.
How to Get Started with JSM Assets
Step 1: Activate Premium (Required)
Assets is only available in JSM Premium. There's no way around this.
Current pricing (as of 2026):
- JSM Premium: $57.30 per agent/month (1-10 agents)
- Includes Assets, Virtual Agents, and Operations
Getting your trial:
- Go to your Atlassian instance
- Navigate to JSM project settings
- Click "Start Premium Trial"
- You should get 30-60 days (I recently got 60 days on a demo instance)
Pro tip: Even if you're on Standard, activate the trial to test Assets. Thirty days is plenty of time to build a proof of concept and calculate your ROI.
Step 2: Access the Assets Interface
Once Premium is activated:
- You'll see Assets appear in the top navigation menu
- Click on it to access the Assets management area
- This is where you'll create and manage your object schemas
First-time view: You won't have any schemas yet. That's normal. We're about to create one.
Understanding Object Schemas
Before we dive into creation, let's clarify terminology:
Object Schema = A container for related assets (like a database)
Object Type = Categories within your schema (like Laptops, Phones, Software)
Objects = Individual assets (like "Dell Inspiron #1234")
Attributes = Properties of objects (like Serial Number, Purchase Date, Owner)
Think of it like this:
Object Schema: "IT Assets"
  └─ Object Type: "Laptops"
      ├─ Object: "Dell Inspiron 15"
      │   ├─ Attribute: Serial Number
      │   ├─ Attribute: Assigned To
      │   └─ Attribute: Purchase Date
      └─ Object: "MacBook Pro 14"
Creating Your First Object Schema
Option 1: Use Templates (Recommended for Beginners)
- Click Create Object Schema
- You'll see three pre-built templates:
- IT Assets Management (most common)
- HR Management
- Facilities Management
My recommendation: Start with IT Assets Management template for learning.
Why use templates?
- Pre-configured object types (Laptops, Phones, Software, etc.)
- Sensible default attributes
- Proper relationships already set up
- You can customize everything later
- Select "IT Assets Management"
- Give it a name (e.g., "Company IT Assets")
- Click Create
Important caveat: Some field names in templates can't be changed. If this bothers you (or you need very specific naming), start with a blank schema instead.
Option 2: Blank Schema (Recommended for Production)
When I deploy for clients, I usually go blank. Here's why:
- Complete control over naming conventions
- No unnecessary fields cluttering the interface
- Builds exactly what you need, nothing more
- Easier to maintain long-term
To create blank schema:
- Click Create Object Schema
- Select "Blank Schema"
- Name it (e.g., "IT Assets - Production")
- Click Create
Pro tip: Spend time with the template first to understand how Assets works. Then create your production schema from scratch.
Building Object Types (The Fun Part)
Let's say you started with a blank schema. Now you need to add object types.
Creating a "Laptops" Object Type
- Inside your schema, click Create Object Type
- Name it: "Laptops"
- Add an icon (optional but helpful for visual identification)
- Click Create
Adding Attributes to Laptops
Attributes define what information you track. For Laptops, you might want:
Essential attributes:
- Serial Number (Text, Unique)
- Model (Text)
- Manufacturer (Text or Select List: Dell, HP, Apple, Lenovo)
- Purchase Date (Date)
- Warranty Expiry (Date)
- Status (Select: Available, Assigned, In Repair, Retired)
- Assigned To (User)
To add an attribute:
- Click on your "Laptops" object type
- Click Configure > Attributes
- Click Create Attribute
- Choose attribute type (Text, Number, Date, Select, User, etc.)
- Name it
- Set if it's required, unique, or has a default value
- Click Create
Consultant tip: Don't over-engineer attributes. Start with 5-7 essential fields. You can always add more later. Every attribute is another field someone has to fill in, and data quality suffers when forms are too long.
Creating Relationships Between Object Types
This is where Assets gets powerful.
Example: You might want to link:
- Laptops → Assigned To → Employees
- Software Licenses → Installed On → Laptops
- Monitors → Connected To → Laptops
To create a relationship:
- Go to your object type (e.g., Laptops)
- Click Configure > Attributes
- Click Create Attribute
- Choose Object or Object (Multiple) as the type
- Select which object type it should reference
- Name it (e.g., "Assigned To")
- Click Create
Adding Assets (Objects)
Now let's actually add some laptops to track.
Method 1: Manual Entry (Quick Start)
- Navigate to your "Laptops" object type
- Click Create Object
- Fill in the attributes:
- Name: "Dell Inspiron 15 - #12345"
- Serial Number: "ABC123XYZ"
- Manufacturer: "Dell"
- Status: "Available"
- Click Create
For learning: Add 3-5 demo objects to test with.
Method 2: CSV Import (NEW in 2026 - Best for Bulk)
This is a game-changer for migrating existing asset lists.
- Prepare your CSV file with columns matching your attributes:
Name,Serial Number,Manufacturer,Model,Purchase Date,Status
Dell Inspiron 15,ABC123,Dell,Inspiron 15,2024-01-15,Available
MacBook Pro 14,XYZ789,Apple,MacBook Pro 14,2024-02-20,Assigned
HP EliteBook 840,DEF456,HP,EliteBook 840,2024-03-10,Available
- In Assets, navigate to your object type
- Click Import > CSV Import
- Upload your CSV file
- Map CSV columns to attributes
- Review and confirm
- Click Import
My experience: The CSV import works surprisingly well. I've imported 500+ assets in one go without issues. Just make sure your CSV is clean first.
Method 3: API Import (Coming Soon in My Tutorial)
For advanced users, you can now use the full Assets API to programmatically manage assets.
Use cases:
- Sync with existing databases
- Automate asset creation from other systems
- Bulk updates based on external data
I'll be publishing Python scripts for this soon. Stay tuned.
Integrating Assets with JSM Service Desk
This is where Assets becomes truly powerful—connecting your asset database to service requests.
Step 1: Create an Assets Custom Field
- Go to your JSM project
- Navigate to Project Settings > Fields
- Click Create Custom Field
- Select Assets as the field type
- Name it (e.g., "Laptop Model" or "Equipment")
- Click Create
Step 2: Configure the Field with AQL
AQL (Assets Query Language) filters which assets appear in the field.
Example AQL queries:
Show only available laptops:
objectType = "Laptops" AND Status = "Available"
Show all laptops:
objectType = "Laptops"
Show laptops and phones:
objectType IN ("Laptops", "Phones")
To add AQL to your field:
- Click on your newly created Assets field
- Find the AQL Query section
- Enter your query
- Click Save
Step 3: Add Field to Request Type
Now let's add this to a form users will see.
- Go to Project Settings > Request Types
- Select a request type (e.g., "New Hire Onboarding")
- Click Fields
- Find your Assets field in the available fields
- Drag it onto the form
- Position it where you want
- Click Save
Pro tip: You can make the field:
- Required (user must select an asset)
- Optional (user can skip)
- Allow multiple selections (user can select several assets)
Real Example: New Hire Onboarding Form
Let me show you a practical implementation.
Scenario: New employee joining. HR submits a form requesting:
- Laptop
- Phone
- Software licenses
Form setup:
- Create request type: "New Hire Onboarding"
- Add fields:
- Employee Name (text)
- Start Date (date)
- Department (select)
- Laptop Model (Assets field with AQL:
objectType = "Laptops" AND Status = "Available") - Phone Model (Assets field with AQL:
objectType = "Phones" AND Status = "Available") - Software Required (Assets field, multiple selection, AQL:
objectType = "Software")
What happens when submitted:
- Request is created in JSM
- Selected assets are automatically linked to the ticket
- You can see which specific laptop/phone was requested
- IT team can update asset status to "Assigned"
- Asset record shows it's linked to this ticket
Viewing Assets in Tickets
When viewing a ticket:
- You'll see the linked assets in the ticket details
- Click on an asset to jump directly to its Assets page
- From the Assets page, you can see all tickets related to that asset
- This creates full traceability
Example: Laptop #12345 shows:
- Ticket #101: Assigned during onboarding
- Ticket #156: Repair request for keyboard
- Ticket #203: Return during offboarding
This history is invaluable for asset lifecycle management.
Asset Reports and Dashboards (2026 Update)
Atlassian redesigned the reporting system. It's better than before, but still has limitations.
Accessing Reports
- Go to Assets in top navigation
- Click Reports
- You'll see various report types
Available Report Types
Object Reports:
- Count of objects by type
- Objects by status
- Objects by owner
- Custom attribute reports
Relationship Reports:
- Objects and their relationships
- Dependency mapping
My honest take: The reports are slow and sometimes don't pull data correctly. I've had reports show empty results when I know data exists. It's improving, but it's not as robust as I'd like for enterprise use.
Workaround: For critical reporting, I often export to CSV and analyze in Excel or create custom dashboards in Jira.
New Dedicated Dashboards (2026)
This is a welcome addition. You can now create:
- Asset Overview Dashboard - Summary of all assets
- Status Tracking Dashboard - Available vs Assigned vs Retired
- Department Allocation Dashboard - Which departments have which equipment
To create a dashboard:
- Go to Assets > Dashboards
- Click Create Dashboard
- Add widgets for different metrics
- Customize layout
- Share with team
Limitation: Dashboards are still basic compared to Jira dashboard capabilities. They work, but don't expect advanced BI features.
Best Practices from 14+ Years of Implementations
1. Start Simple, Scale Gradually
Don't do this:
- Create 20 object types on day one
- Add 30 attributes to each object
- Build complex relationship webs before testing
Do this:
- Start with 2-3 core object types
- 5-7 essential attributes per type
- Test with real users for 2 weeks
- Add complexity based on actual needs
2. Focus on Data Quality Over Quantity
Better to have:
- 100 assets with complete, accurate data
- Than 1,000 assets with missing or incorrect data
How to ensure quality:
- Make critical fields required
- Use select lists instead of free text where possible
- Regular audits (quarterly reviews)
- Assign asset data ownership to specific people
3. Use Status Fields Religiously
Every object should have a clear status:
- Available
- Assigned
- In Transit
- In Repair
- Retired
- Lost/Stolen
Why: Status is your filter for everything. You can't assign unavailable equipment. You can't forget about laptops in repair limbo.
4. Leverage Automation
Connect Assets to JSM automation:
Example automations:
- When ticket status = "Resolved" → Update asset status to "Assigned"
- When asset status = "In Repair" → Create follow-up ticket after 7 days
- When new hire request is created → Auto-assign available laptop
I'll cover advanced automation in a future tutorial, but automation is what makes Assets truly powerful.
5. Plan for Offboarding
Most common gap I see: Great onboarding process, terrible offboarding.
Essential offboarding workflow:
- Employee resignation submitted
- Offboarding ticket created
- Assets linked to employee are identified
- Return checklist generated
- Asset status updated to "In Transit"
- Asset checked and updated to "Available"
- Ready for next employee
Without this, equipment disappears into the void.
Common Mistakes to Avoid
❌ Mistake #1: Treating Assets as Documentation
Problem: Creating assets for every possible thing, including non-physical items that don't need tracking.
Solution: Assets should be for tangible things you need to track lifecycle, location, and ownership. Not everything needs to be an asset.
❌ Mistake #2: Over-Complicated Relationships
Problem: Building elaborate relationship hierarchies that nobody understands or maintains.
Solution: Keep relationships simple and obvious. Laptop → Assigned To User. Software → Installed On Laptop. That's usually enough.
❌ Mistake #3: Ignoring the API (Now Available)
Problem: Manually maintaining assets when you have 100+ items.
Solution: With full API access in 2026, you can automate updates, sync with other systems, and bulk manage assets programmatically.
❌ Mistake #4: Not Training Your Team
Problem: Implementing Assets but not teaching agents how to use it.
Solution: 30-minute training session showing:
- How to search for assets
- How to link assets to tickets
- How to update asset status
- How to create new assets
Assets on Jira Claud: My Honest Opinion
Assets evoked and in the current shape it's very good products but still few features missing spared to the Jira Data Center, I pony hope Atlassian will make it even more powerful in 2026 and beyond.
Cloud improvements (2026 revision):
- Full API access (NEW)
- CSV import works well (NEW)
- Dedicated dashboards (NEW)
- Easier to manage (no infrastructure)
- Regular updates from Atlassian
My take: Cloud is catching up. The 2026 updates addressed many of my concerns. If you're starting fresh, Cloud is fine for most use cases. If you're enterprise with complex requirements, Data Center might still be worth considering.
Is JSM Assets Worth the Premium Price?
Short answer: If you need asset management, yes. If you don't, no.
Calculate your ROI:
Cost: Premium is ~$57/agent/month vs $25 for Standard
- Difference: $32/agent/month
- 10 agents = $320/month extra = $3,840/year
Savings/Benefits:
- Eliminate separate asset tracking tools ($5K-15K/year)
- Reduce lost/missing equipment (could be $10K+/year)
- Faster onboarding (time savings)
- Better compliance and auditing
- Complete equipment visibility
My client's example:
- Replaced 3 separate tools
- Saved £10K/year in licensing
- Recovered 15 "lost" laptops worth £15K
- ROI achieved in under 3 months
Bottom line: If you're juggling spreadsheets, multiple tools, or losing track of expensive equipment, Premium pays for itself quickly.
What's Next?
You now have everything you need to get started with JSM Assets. Here's what to do:
Week 1:
- Activate Premium trial
- Create test object schema using template
- Add 10-20 demo assets
- Link one request type to Assets
- Test the full workflow
Week 2:
6. Calculate your ROI (cost vs current tools)
7. Plan your production schema
8. Define object types and attributes
9. Start CSV import preparation
Week 3:
10. Build production schema
11. Import bulk assets
12. Train your team
13. Go live
Beyond:
- Explore API integration (my Python scripts coming soon)
- Build automation between requests and assets
- Implement full onboarding/offboarding
- Create custom dashboards
Coming Soon
I'm creating follow-up tutorials on:
Python Scripts for Assets API - Automate asset creation, updates, and sync with external systems
Advanced Asset Automation - Complex workflows connecting JSM requests to asset lifecycle
Onboarding/Offboarding Complete System - The exact setup I built for my £10K savings client
Assets + Forms Deep Dive - Building intelligent request forms with dynamic asset selection
Need help implementing Assets for your organization? I work with teams to build sustainable asset management systems that actually get used. From initial setup to complex integrations, I can help you design a system that fits your needs—not an over-engineered mess.
Whether you're tracking 50 laptops or managing a 10,000-asset enterprise CMDB, I've done it before. Book a consultation to discuss your specific requirements.
Also check out:
- JSM Quick Start Guide - Set up your service desk in 15 minutes
- JSM Overview 2026 - Understanding JSM and why it's booming
- Join my Skool community for implementation tips and peer support