Complete JSM Employee Onboarding System (No Premium Required)

Real client story: Last month, a 1,500-person insurance company in London called me. Their onboarding was a disaster—new employees waiting weeks for laptops, system access, everything. We rebuilt the entire system in JSM. Three weeks of delays became three days of efficiency.
This is exactly how we did it.
Why This Matters (And Why I'm Sharing It)
I build these onboarding systems in 3-5 days for clients ranging from 100 to 5,000 employees. What takes most teams 2-3 weeks of trial and error, I can have running in under a week because I've done it dozens of times.
The system I'm showing you today:
- ✅ No Premium required (though I'll show you the Assets version tomorrow)
- ✅ Works for companies of any size
- ✅ Reduces onboarding time from weeks to days
- ✅ Creates accountability at every step
- ✅ Scales as you grow
Want automatic hardware tracking? See Onboarding with Assets (requires Premium).
This is part 1 of a 3-part series:
- Today: Complete onboarding system (Standard JSM)
- Tomorrow: Onboarding with Assets (automatic hardware tracking)
- Coming soon: Complete offboarding system
Complete the lifecycle with secure offboarding.
Let's dive in.
What We're Building
Here's what this onboarding system includes:
Frontend (What HR/Managers See):
- Clean, intuitive form on the customer portal
- Dynamic fields that change based on selections
- Zero confusion about what information is needed
This system uses JSM Forms to capture new hire info.
Backend (What IT/Admins See):
- Structured workflow with clear stages
- Approval process (optional, can be skipped)
- SLAs tracking preparation and provisioning time
- Automated notifications to managers
- Dedicated queues separating onboarding from other tickets
The Result:
- New employee requests processed in days, not weeks
- Complete visibility into onboarding status
- Nothing falls through the cracks
- Automated handoffs between teams
Step 1: Build the Request Form (The Foundation)
I use Forms for onboarding, not traditional request types. Here's why:
Why Forms Beat Traditional Request Types
✅ Clean, modern design - Looks professional, not like a 2010 web form
✅ Lightning-fast setup - Build complex forms in minutes
✅ Dynamic content - Fields appear/disappear based on user selections
✅ Easy to modify - Change field types with one click
✅ Better user experience - Reduces confusion and errors
The killer feature: Dynamic content. Watch this—when someone selects "Full-time employee," they see standard fields. Switch to "Contractor," and boom—additional contract-specific fields appear. No apps needed. This is native Forms functionality.
Creating Your Onboarding Form
Before you start: Document your onboarding process. Talk to HR. Talk to IT. Get alignment on what information you actually need. This isn't optional—misalignment here causes problems later.
To create the form:
- Go to your JSM project
- Navigate to Forms (in the left sidebar)
- Click Create Form
- Name it: "Employee Onboarding Request"
Essential Form Sections
Here's the structure that works for most organizations:
Section 1: Employee Information
- New Employee Name (Short text, required)
- Personal Email (Email field, required)
- Start Date (Date picker, required)
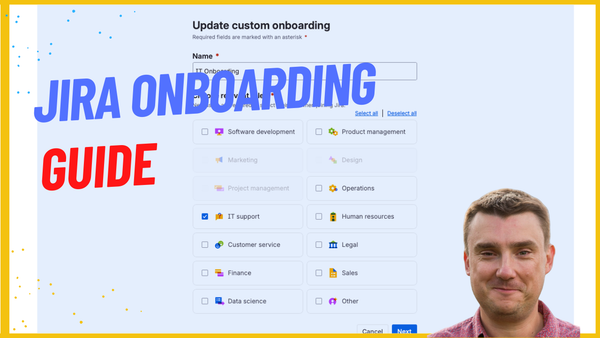
- Department (Dropdown: IT, Finance, Sales, Marketing, Operations, HR)
- Location (Dropdown: London Office, Manchester Office, Remote, etc.)
- Job Title (Short text, required)
- Manager (User picker, required)
Section 2: Employment Type
- Employment Type (Dropdown, required)
- Full-time
- Part-time
- Contractor
- Intern
Here's where dynamic content shines:
If "Contractor" is selected → Show:
- Contract End Date (Date picker)
- Contract Duration (Number field, in months)
- Agency/Company (Short text)
How to set this up:
- Add the "Contract End Date" field
- Click the eye icon next to the field
- Select "Show this field when..."
- Set condition: "Employment Type = Contractor"
- Click Save
Repeat for other contractor-specific fields.
Section 3: System Access Required
- Email Account (Checkbox, checked by default)
- Software Access (Checkboxes, multiple selection)
- Office 365
- Salesforce
- Slack/Teams
- HR System
- CRM
- Project Management Tools
- Other (specify)
Pro tip: Keep this simple. Don't list 50 software options. List your core 5-8 systems, plus "Other" with a text field.
Section 4: Hardware Requirements
This is where dynamic content gets really powerful.
- Computer Type (Dropdown, required)
- PC (default selection)
- MacBook
- No computer needed
Dynamic logic:
If "PC" is selected → Show:
- PC Model (Dropdown)
- Dell Latitude 5430
- HP EliteBook 840
- Lenovo ThinkPad X1
- Other (specify)
If "MacBook" is selected → Show:
- MacBook Model (Dropdown)
- MacBook Air M2
- MacBook Pro 14"
- MacBook Pro 16"
- Other (specify)
Additional hardware:
- Monitor Required (Checkbox)
- Keyboard/Mouse (Checkbox)
- Headset (Checkbox)
- Mobile Phone (Checkbox)
- Additional Equipment (Long text, optional)
Section 5: Additional Information
- Special Requirements (Long text, optional)
- Security Clearance Level (Dropdown, if applicable)
- Budget Code (Short text, if applicable)
The Final Touch: Hidden Fields
Add these fields but hide them from users:
- Summary (Short text, hidden)
- Set default value: "New Employee Onboarding - [Employee Name]"
- This becomes your ticket title
- Request Type (Hidden)
- Set to: "Employee Onboarding"
Why hidden fields matter: They ensure consistency without asking users for redundant information.
Step 2: Create the Request Type
Now we connect the form to JSM.
Important: Create a dedicated request type for onboarding. Don't add it to generic "IT Support" or "General Requests."
Why?
- You need a custom workflow (we'll build this next)
- Dedicated SLAs
- Separate queues
- Different automation rules
To create the request type:
- Go to Project Settings > Request Types
- Click Create Request Type
- Name it: "Employee Onboarding"
- Description: "Submit this request to onboard a new employee"
- Choose an icon (person icon works well)
- Click Create
Link the Form
- Click on your new "Employee Onboarding" request type
- Scroll to Request Form
- Click Change form
- Select your "Employee Onboarding Request" form
- Click Save
Here's what just happened: When users select "Employee Onboarding" from the portal, they'll see your beautiful dynamic form instead of a clunky traditional request type.
Configure Fields (Keep It Minimal)
Since the form handles most fields, you only need:
- Summary (hidden, auto-populated)
- Participants/Approvers (if using approval process)
Don't add every form field as a custom field. The form captures the data. That's enough for most use cases.
Step 3: Build the Workflow
This is where onboarding becomes a structured process instead of chaos.
The Onboarding Workflow Structure
Here's the workflow that works for most organizations:
1. New Request
   ↓
2. Waiting for Approval (optional)
   ↓
3. Approved
   ↓
4. Prepare Access
   ↓
5. Facility Setup
   ↓
6. Pre-Arrival Checklist
   ↓
7. Ready for Day One
   ↓
8. Complete
Why this structure?
- Clear stages everyone understands
- Each stage has a responsible team
- Easy to see where delays happen
- SLAs can track each phase
Creating the Custom Workflow
Important note: I still use the old workflow editor because it works reliably. The new one is fine too—use whichever you prefer.
- Go to Project Settings > Workflows
- Click Add Workflow
- Select Create from scratch
- Name it: "Employee Onboarding Workflow"
- Click Create
Add Statuses
Click Add Status for each stage:
Status 1: New Request
- Category: To Do
- This is your starting status
Status 2: Waiting for Approval (optional)
- Category: To Do
- Include approval functionality
Status 3: Approved
- Category: In Progress
- Transition from: Waiting for Approval
Status 4: Prepare Access
- Category: In Progress
- IT creates accounts, sets permissions
Status 5: Facility Setup
- Category: In Progress
- Facilities prepares workspace, orders equipment
Status 6: Pre-Arrival Checklist
- Category: In Progress
- Final verification before start date
Status 7: Ready for Day One
- Category: In Progress
- Everything confirmed, ready to go
Status 8: Complete
- Category: Done
- Employee started successfully
Add Transitions
Connect your statuses with transitions:
- New Request → Waiting for Approval
- Waiting for Approval → Approved (when approved)
- Waiting for Approval → Rejected (if rejected)
- Approved → Prepare Access
- Prepare Access → Facility Setup
- Facility Setup → Pre-Arrival Checklist
- Pre-Arrival Checklist → Ready for Day One
- Ready for Day One → Complete
Pro tip: Don't create transitions for every possible path. Keep it linear. If something needs to go backwards, agents can manually move it.
About the Approval Process
Do you need approvals? Depends on your organization.
Use approvals if:
- Budget approvals required for equipment
- Manager sign-off needed for contractors
- Security clearance verification needed
- Multiple departments need to sign off
Skip approvals if:
- HR already vetted the hire
- Standard onboarding process
- Speed is more important than gates
How to add approval:
- In the "Waiting for Approval" status
- Click Add Approver
- Select: Manager (from the form), HR Lead, Department Head, etc.
- Set approval rules: All must approve, or any can approve
- Click Save
My approach: Start without approvals. Add them later if you discover you need gates. Don't over-engineer from day one.
Associate Workflow with Request Type
- Go to Project Settings > Request Types
- Click on "Employee Onboarding"
- Scroll to Workflow
- Select your "Employee Onboarding Workflow"
- Click Save
Now your onboarding requests use this dedicated workflow.
Step 4: Configure SLAs
SLAs create accountability and visibility.
Standard SLAs (Default in JSM):
- Time to First Response
- Time to Resolution
For onboarding, you probably don't need "First Response." The request creates action automatically.
Custom SLAs for Onboarding
Here are the SLAs I recommend:
SLA 1: Access Preparation
What it tracks: How long IT takes to prepare accounts
Configuration:
- Name: "Access Preparation"
- Goal: 2 business days
- Start: When status changes to "Approved"
- Stop: When status changes to "Facility Setup"
- Calendar: Business hours (Mon-Fri, 9am-5pm)
SLA 2: Equipment Provisioning
What it tracks: How long to order/prepare equipment
Configuration:
- Name: "Equipment Provisioning"
- Goal: 5 business days
- Start: When status changes to "Facility Setup"
- Stop: When status changes to "Pre-Arrival Checklist"
- Calendar: Business hours
SLA 3: Overall Onboarding
What it tracks: Total time from request to ready
Configuration:
- Name: "Overall Onboarding Time"
- Goal: 10 business days
- Start: When issue is created
- Stop: When status = "Ready for Day One"
- Calendar: Business hours
Why these specific SLAs?
- They track the stages that typically cause delays
- They create accountability for each team
- They give you data to improve the process
To create an SLA:
- Go to Project Settings > SLAs
- Click Create SLA
- Fill in the details above
- Click Save
Step 5: Set Up Automation (The MVP)
Automation isn't required on day one, but these rules make life much easier.
Automation 1: Auto-Assign Based on Location/Department
What it does: Automatically assigns the ticket to the right team based on employee location or department.
Rule setup:
- Go to Project Settings > Automation
- Click Create Rule
- Trigger: Issue Created
- Condition: Request Type = Employee Onboarding
- Add Condition: Location = London Office
- Action: Assign Issue to "London IT Team"
- Name it: "Auto-assign onboarding - London"
- Click Turn on rule
Repeat for each location/department.
Alternative approach: Assign to a general "Onboarding Queue" and let agents claim them.
Automation 2: Manager Notification via Teams/Slack
What it does: Notifies the employee's manager when onboarding starts.
Why not email? I'm trying to reduce email overload. Webhook notifications to Teams/Slack work better.
Rule setup (Teams):
- Create rule
- Trigger: Status Changed to "Approved"
- Action: Send Web Request
- Webhook URL: [Your Teams incoming webhook URL]
- Body (JSON):
{
  "@type": "MessageCard",
  "summary": "New Employee Onboarding",
  "sections": [{
    "activityTitle": "Onboarding Started",
    "facts": [{
      "name": "Employee:",
      "value": "{{issue.customfield_newemployeename}}"
    },{
      "name": "Start Date:",
      "value": "{{issue.customfield_startdate}}"
    },{
      "name": "Department:",
      "value": "{{issue.customfield_department}}"
    }],
    "markdown": true
  }]
}
- Name it: "Notify manager via Teams"
- Click Turn on rule
For Slack: Use Slack's incoming webhook format instead.
Pro tip: Test webhooks with a test channel first. Don't spam your CEO's channel with test notifications.
Automation 3: Pre-Arrival Checklist
What it does: Adds a comment with a checklist when status moves to "Pre-Arrival Checklist"
Rule setup:
- Create rule
- Trigger: Status Changed to "Pre-Arrival Checklist"
- Action: Add Comment
- Comment:
Pre-Arrival Checklist - Verify all items before marking complete:

☐ Email account created and tested
☐ System access provisioned
☐ Computer prepared and configured
☐ Monitor/peripherals ready
☐ Desk/workspace prepared
☐ Building access badge ready
☐ Welcome email sent to employee
☐ Manager notified of start date
☐ IT orientation scheduled

Tag the assignee when complete.
- Name it: "Add pre-arrival checklist"
- Click Turn on rule
Why this works: The checklist ensures nothing is forgotten. It's visible to everyone. It creates accountability.
Automation 4: Status Change Notification
What it does: Comments on the ticket when status changes, creating an audit trail.
Rule setup:
- Create rule
- Trigger: Status Changed
- Condition: Request Type = Employee Onboarding
- Action: Add Comment
- Comment: "Status changed from {{changelog.fromString}} to {{changelog.toString}} by {{initiator.displayName}}"
- Name it: "Log status changes"
- Click Turn on rule
My philosophy on automation: Start with these 3-4 rules. Run the system for a few weeks. Then add more automation based on what you discover you're doing manually over and over.
Don't create 20 automation rules on day one. You'll create a nightmare to debug.
Step 6: Configure Queues
Queues help your team organize onboarding work separately from other tickets.
Why separate queues?
- Onboarding has different priorities than break-fix tickets
- Different teams work on onboarding
- Easier to see onboarding workload at a glance
- Reduces confusion
Creating Onboarding Queues
Queue 1: All Onboarding Requests
JQL:
"Request Type" = "Employee Onboarding" AND status != Complete
This shows all active onboarding requests.
Queue 2: Pending Approval
JQL:
"Request Type" = "Employee Onboarding" AND status = "Waiting for Approval"
For managers/approvers to see what needs their attention.
Queue 3: In Progress Onboarding
JQL:
"Request Type" = "Employee Onboarding" AND status IN ("Prepare Access", "Facility Setup", "Pre-Arrival Checklist")
Active work that needs attention.
Queue 4: Upcoming Start Dates
JQL:
"Request Type" = "Employee Onboarding" AND "Start Date" <= 7d AND status != Complete
Employees starting in the next 7 days. Critical visibility.
Queue 5: Overdue Onboarding
JQL:
"Request Type" = "Employee Onboarding" AND "Start Date" < now() AND status != Complete
Red flag queue. These are problems.
Setting Favorites
Make these queues easy to access:
- Click the star icon next to "All Onboarding Requests"
- This pins it to the top for quick access
Pro tip: Set the "All Onboarding Requests" queue as the default view for your onboarding team.
Step 7: Testing the Complete System
Before going live, test the entire workflow:
Test Checklist
1. Submit a test request
- Does the form work correctly?
- Do dynamic fields appear/disappear properly?
- Does the request create successfully?
2. Check ticket creation
- Is the summary formatted correctly?
- Are all form fields captured?
- Is it assigned to the right person/team?
3. Move through workflow
- Can you transition between statuses?
- Do SLAs start/stop correctly?
- Does the approval process work (if enabled)?
4. Verify automation
- Do notifications fire correctly?
- Do comments add when expected?
- Are status changes logged?
5. Check queues
- Does the ticket appear in the right queues?
- Do JQL queries work correctly?
Fix any issues before going live. It's much easier to debug with test data than production data.
Going Live: The Rollout Plan
You've built the system. Now you need people to use it.
Week 1: Soft Launch
- Send announcement to HR team only
- Ask them to submit all new hire requests through the new system
- Monitor closely for issues
- Collect feedback
Week 2: Training
- 30-minute session with IT team showing:
- How to work tickets in the new workflow
- What each status means
- How to use queues
- Key automation rules
- Q&A time
- Provide quick reference guide
Week 3: Full Launch
- Announce to all managers
- Share portal URL and instructions
- Make old process unavailable
- Monitor adoption
Week 4+: Optimize
- Review metrics:
- Average onboarding time
- SLA breaches
- Common bottlenecks
- Adjust workflow/SLAs based on real data
- Add automation for repetitive tasks
Real Results from Real Clients
Insurance company (1,500 employees):
- Before: 3 weeks average onboarding time
- After: 3 days
- Eliminated: Laptop delivery delays, access request confusion
- ROI: Massive improvement in new hire experience
Tech startup (120 employees):
- Before: Spreadsheet tracking, frequent missed items
- After: Zero missed onboarding steps
- Benefit: Professional onboarding experience for rapid hiring
Healthcare organization (800 employees):
- Before: Compliance nightmares, security gaps
- After: Complete audit trail, proper access controls
- Benefit: Passed regulatory audit with flying colors
Common Mistakes to Avoid
❌ Mistake #1: Over-Engineering Day One
Problem: Building 15-step workflows, 50 automation rules, complex approval chains before testing with real users.
Solution: Start with the MVP I showed you. Add complexity based on real needs.
❌ Mistake #2: Not Getting HR Buy-In
Problem: Building a system IT thinks is great, but HR refuses to use.
Solution: Involve HR from the beginning. Show them the form. Get their feedback. Make them part of the design.
❌ Mistake #3: Ignoring the Form Experience
Problem: Ugly, confusing forms that intimidate users.
Solution: Use Forms (not traditional request types). Test the form with a non-technical person. If they're confused, simplify.
❌ Mistake #4: No Dedicated Queues
Problem: Onboarding requests mixed with "printer is broken" tickets. Chaos ensues.
Solution: Separate queues. Separate workflow. Separate focus.
❌ Mistake #5: Set-It-and-Forget-It
Problem: Launch the system, never look at it again, wonder why it doesn't work perfectly.
Solution: Review metrics monthly. Talk to your team. Continuously improve.
What's Next: The 3-Part Series
This is your complete onboarding system using standard JSM features. But we're not done.
Tomorrow: Onboarding with Assets
I'll show you how to add automatic hardware tracking:
- Assets database integration
- Auto-assign equipment during onboarding
- Track who has what
- Prepare for offboarding
Coming Soon: Complete Offboarding System
The flip side of onboarding:
- Equipment recovery
- Access revocation
- Knowledge transfer
- Compliance requirements
Subscribe so you don't miss these.
The Bottom Line
This onboarding system works. I've deployed it dozens of times for companies ranging from 100 to 5,000 employees.
You can spend 2-3 weeks building this yourself, dealing with trial and error, figuring out what works.
Or I can have it running in your environment in under a week. I've done this so many times I can practically do it in my sleep.
The system I showed you today:
- Reduces onboarding from weeks to days
- Creates accountability at every step
- Eliminates "forgot to provision access" disasters
- Scales with your organization
- Requires no Premium license
If you want this running this week instead of spending three weeks figuring it out, book a 15-minute discovery call. We'll talk about your specific needs, and I'll show you exactly how this will work for your organization.
Coming tomorrow: Assets integration for automatic hardware tracking. Hit subscribe so you don't miss it.
Have questions? Drop them in the comments. I read every single one and respond.